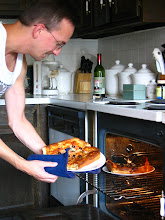
We continue our four-part series on How to Team Up in the Kitchen with Part 3. Be sure to take a look at Part 1 and Part 2.
**************************
Part 3: Three Strategies to Create Personal Space in Your Kitchen
Okay. You’ve decided on a dish to cook, you’ve chosen your King, and you’ve figured out how to divide and conquer the various tasks that need to get done to complete the meal. Congratulations, you’ve done a lot of the heavy lifting towards teaming up and getting dinner on the table!
However, you’re still left with a key potential source of kitchen friction which comes (both literally and figuratively) from everybody trying to get at the same counter space or use the same tools at the same time. Instead of cooking, you’re climbing all over each other and getting in each other’s way.
Once again, the crown weighs heavy, as it is the king’s job to solve this problem of too many cooks and not enough space. So today I’ll share with you three strategies to help make sure everybody has plenty of room to work in the kitchen.
1) Establish Separate Workspaces
Let’s face it: you can’t add a lot of value preparing dinner if you're waiting to use a given cooking tool, or if you’re spending all your time and energy getting in and out of the way of other people. If you are king, you must be mindful of this when you delegate cooking tasks to your team.
First, you should give each serf a dedicated workspace, even if it’s not technically in the kitchen. Second, why not lay out tools, cutting boards, or whatever equipment each job requires, in each of the separate locations for each person? If you follow these two steps you’ll right away pre-empt a lot of crowding.
Most importantly, however, you should think about how best to break down the work such that it can be done well at separate workstations. And this brings us to our next strategy:
2) Keep the Tasks Discrete
Before you dole out any tasks to your team, you should make sure each task is specific, clearly defined, and has an obvious beginning point and ending point.
Good examples of clearly defined, discrete tasks would be things like “make the salad,” “set the table,” “prepare dessert” or “wash/rinse the produce and set it out to be prepped.” These are classic dinner building-block jobs that can be divided up easily among a duo or even a team of cooks.
Granted, I know some of these tasks may seem a bit mindless, but that that can actually be a good thing, depending on what kind of serfs you have working for you. I know I have days when I really want to leave the higher-order tasks to somebody else--let me do something mindless like cutting up veggies! Therefore, be sure to think about what kind of temperament your cooking counterparts have and plan accordingly.
What you don’t want to do is allow tasks to blur into each other, or give one task to two people unless it can be easily and obviously broken down. For example, don’t assign two people to do prep work unless you have two sets of knives, two cutting boards, enough room, and an obvious way to divide up the produce that needs to be prepped. And don’t try to have multiple people washing or rinsing produce, unless of course you have two or more kitchen sinks (which we certainly don’t!).
One other thought: If your serfs already know a lot about cooking and are ready and willing to handle more complex tasks, consider delegating the entire prep work process. Give your serfs the whole job and endow them with wide latitude to complete it the best way they see fit. This is a surprisingly good example of a discrete task, although depending on the recipe it can be an admittedly big and complicated task too. See if your serfs can rise to the challenge.
Also, if you have older children who are truly beginning to display some skills and interest in cooking, delegating complex responsibility like this is a great way to engage them creatively in the cooking process.
Let’s move on to our final space-creating strategy:
3) Use “Temporal Space” If You Have a Shortage of Physical Space
In the New York City metro area where we live, kitchen space comes at a premium. If you have a small kitchen or cooking area, I encourage you to think of workspace in both spatial and temporal terms. What do I mean by that? I simply mean you don’t necessarily have to have everybody working at exactly the same time in exactly the same place.
Instead, have one serf do a task, set it aside, and then have another serf complete the next task immediately afterward. Repeat as needed. Your team does the work in the same physical location, but at different space-time coordinates (for lack of a better term). The jobs thus get done in series, rather than in parallel.
Remember the example I gave in the previous article, where one person does some of the preliminary work, another person does the rest of work, and then the king breezes in like a TV chef and finishes off the meal? That’s a perfect example of using temporal space. Each person effectively has his own workspace by working in series in the same physical space.
Result? Dinner might take a bit longer to make, but it will be ready with zero crowding and zero friction.
Stay tuned for the fourth and final installment of the "How to Team Up in the Kitchen" series: Capitalize on Your Cooking Core Competencies.


How to Divide and Conquer Your Cooking Labors
This is Part 2 of a four-part series on How to Team Up in the Kitchen. If you haven't already, please take a look at Part 1.
**************************
Part 2: How to Divide and Conquer Your Cooking Labors
As you'll recall from Part 1, being King isn’t always fun and games and ordering people around. There is a weight of responsibility too, as the king’s duty, in addition to choosing the meal and getting it on the table, is figuring out an effective way to divide up the work. What is the best way to designate the responsibility of meal preparation so that everything is done well, the serfs don't revolt from overwork, and the meal is ready on time?
Ah, the crown can weigh heavily on the brow of the king. But don't get discouraged. There are lots of ways to divide up the workflow of a meal in an effective way. Here are a few highly typical examples that we've used in our kitchen:
1) One person creates the grocery list and goes to the store, another person plans the menu and makes the meal.
2) One person cooks everything, another does clean-up duty (sometimes the idea of cooking AND cleaning up afterward is just too much to bear).
3) One person washes/pre-preps the vegetables and sets everything out on a cutting board ready to go, another person blasts through all the actual chopping. Then, the King breezes in like a TV chef and makes the meal with the bulk of the manual labor already done.
These are admittedly generic suggestions. Since much of the division of labor depends on the nature of the recipe you're making, a highly specific list of labor division ideas would probably be infinitely long. Also, you can use combinations and permutations of these ideas, depending on whether you have one spouse-serf or a team of children-serfs at your disposal.
But don't worry so much about specific details just yet; my goal is to get you thinking about general and logical ways to break down dinner into something managable. With practice, you'll come up with the best solutions for dividing up workflow as you develop a feel for the core skills and task preferences of your serfs. We'll go deeper into how to optimize everyone's core skills in Strategy #4.
Let's face it; cooking isn't always a blast, especially when you have a family to feed every damn night. Sure, there are plenty of cooking shows, cookbooks (and even blogs like this one) that try to make cooking seem like some kind of consistently glorious act of personal expression. The real truth is that sometimes cooking is an obligatory, and occasionally a truly depressing, job.
But remember, you are king! If you use the suggestions above as a framework to think about logical ways to break down dinner preparation, you’ll be surprised how quickly everybody completes their tasks, and how even highly complicated meals get whipped up in no time by a well-oiled family team.
For additional thoughts on issues surrounding doing prep work, outsourcing, and teaming up to do kitchen tasks in parallel, see my Seven Ways to Get Faster at Cooking essay.
We'll be back shortly with Part 3: Three Strategies to Create Personal Space in Your Kitchen.
**************************
Part 2: How to Divide and Conquer Your Cooking Labors
As you'll recall from Part 1, being King isn’t always fun and games and ordering people around. There is a weight of responsibility too, as the king’s duty, in addition to choosing the meal and getting it on the table, is figuring out an effective way to divide up the work. What is the best way to designate the responsibility of meal preparation so that everything is done well, the serfs don't revolt from overwork, and the meal is ready on time?
Ah, the crown can weigh heavily on the brow of the king. But don't get discouraged. There are lots of ways to divide up the workflow of a meal in an effective way. Here are a few highly typical examples that we've used in our kitchen:
1) One person creates the grocery list and goes to the store, another person plans the menu and makes the meal.
2) One person cooks everything, another does clean-up duty (sometimes the idea of cooking AND cleaning up afterward is just too much to bear).
3) One person washes/pre-preps the vegetables and sets everything out on a cutting board ready to go, another person blasts through all the actual chopping. Then, the King breezes in like a TV chef and makes the meal with the bulk of the manual labor already done.
These are admittedly generic suggestions. Since much of the division of labor depends on the nature of the recipe you're making, a highly specific list of labor division ideas would probably be infinitely long. Also, you can use combinations and permutations of these ideas, depending on whether you have one spouse-serf or a team of children-serfs at your disposal.
But don't worry so much about specific details just yet; my goal is to get you thinking about general and logical ways to break down dinner into something managable. With practice, you'll come up with the best solutions for dividing up workflow as you develop a feel for the core skills and task preferences of your serfs. We'll go deeper into how to optimize everyone's core skills in Strategy #4.
Let's face it; cooking isn't always a blast, especially when you have a family to feed every damn night. Sure, there are plenty of cooking shows, cookbooks (and even blogs like this one) that try to make cooking seem like some kind of consistently glorious act of personal expression. The real truth is that sometimes cooking is an obligatory, and occasionally a truly depressing, job.
But remember, you are king! If you use the suggestions above as a framework to think about logical ways to break down dinner preparation, you’ll be surprised how quickly everybody completes their tasks, and how even highly complicated meals get whipped up in no time by a well-oiled family team.
For additional thoughts on issues surrounding doing prep work, outsourcing, and teaming up to do kitchen tasks in parallel, see my Seven Ways to Get Faster at Cooking essay.
We'll be back shortly with Part 3: Three Strategies to Create Personal Space in Your Kitchen.
How to Team Up in the Kitchen
The purpose of this four-part series of posts is to help you collaborate in the kitchen with your significant other (or even your entire family) with a bare minimum of friction.
Let me start by stating my personal qualifications on this matter. Like most married couples, Laura and I have had our fair share of turf battles. And in years past, our kitchen was a truly unique theater of war on which we've had some of our greatest fights. I'd tell you some war stories, but in the interests of time let me summarize by saying they mostly had to do with me being a micromanager and Laura chasing me out of the kitchen with various sharp objects.
Fortunately, we emerged from this dark era of conflict with a healthy awareness of how to team up in the kitchen. We learned to decide who's in charge, how to share work and divide up the workplace in a sensible way, and how to take advantage of each of our individual cooking skills and interests. Cooking suddently started to require a lot less effort, and it wasn't long before it grew into something we actually do for fun.
Cooking is one of those activities that the whole family can get involved in, and there is no pleasure greater than spending quality time with your family creating and enjoying great food.
Over the next two weeks, I'll share the four key strategies that have helped us team up in the kitchen.
Part 1: Choose Your King
Part 2: How to Divide and Conquer Your Cooking Labors
Part 3: Three Strategies to Create Personal Space in Your Kitchen
Part 4: Capitalize on Your Cooking Core Competencies
I hope this series of posts will encourage you and your family to team up in your kitchen too. We'll start today with Part 1.
*********************************
Part 1: Choose Your King
The fundamental problem most kitchen collaborations suffer from, and the fundamental problem Laura and I always had in our early days, was a battle for control. Maybe we'd successfully agree on what to cook, but once we actually began cooking we'd both attack the recipe full-force, giving out instructions and orders to each other. It was chaos. Two kitchen Napoleons simply cannot coexist in the same kitchen at the same time.
Eventually, one of us would win out and start controlling the direction of things. And of course the other person would usually be annoyed and feel like a second class citizen. Nobody was in charge, there was no succession plan, and we wasted a lot of energy fighting out a battle for control before we ever got down to cooking.
Finally, after staring one too many times at the business end of a paring knife, I came up with the "King" idea. "Hey," I said, "let's decide ahead of time who's the boss here. And don't worry, I'll just be King for a day. We'll take turns and you can be king the next time we cook."
What exactly does it mean to be "King" then? Think of the king as a kind of all-powerful general contractor for dinner. The king decides what to cook, and how it's going to be cooked. The king is responsible for completing the dish satisfactorily at a time agreed upon in advance with his or her subjects. The king also gets to delegate some of the work involved (but only some, as we'll see below), and figures out who should do what task and when.
We’ve found that allocating nearly complete powers to the King works well for us, but of course you can delineate the powers of your version of the king in a way that works best for you. The key point is that you should always choose your king together before starting up a recipe. You'll be stunned at how much smoother things go once that decision is out of the way.
And certainly it goes without saying that you need to take turns being king. We've settled into roughly a 60/40 split favoring me with kingly powers, but that’s only because I tend to do more of the cooking in our home.
Another king-related rule we have is this: if you come up with the meal idea, YOU get to be king. This makes being king a reward for dinner idea generation, as well as a reward for initiative. Of course, the king still typically ends up doing much of the work too, and that's deliberate: you want the pleasures of royalty to only slightly outweigh the burdens of command. You don't want the king to live off the backs of the serfs in some kind of kitchen feudalism. Thus, being king is a good thing, but not so good that you won't share the title next time around.
Another compelling idea would be to let your kids be king once in a while (after they’ve developed the basic skills of cooking of course). Imagine being a teenager and getting to order your parents to do prep work! Who knows, not only will this give your kids an extra opportunity to appreciate cooking, it could help them develop skills in management and leadership.
I'll be back in a couple of days with Part 2: How to Divide and Conquer Your Cooking Labors. Stay tuned!
Let me start by stating my personal qualifications on this matter. Like most married couples, Laura and I have had our fair share of turf battles. And in years past, our kitchen was a truly unique theater of war on which we've had some of our greatest fights. I'd tell you some war stories, but in the interests of time let me summarize by saying they mostly had to do with me being a micromanager and Laura chasing me out of the kitchen with various sharp objects.
Fortunately, we emerged from this dark era of conflict with a healthy awareness of how to team up in the kitchen. We learned to decide who's in charge, how to share work and divide up the workplace in a sensible way, and how to take advantage of each of our individual cooking skills and interests. Cooking suddently started to require a lot less effort, and it wasn't long before it grew into something we actually do for fun.
Cooking is one of those activities that the whole family can get involved in, and there is no pleasure greater than spending quality time with your family creating and enjoying great food.
Over the next two weeks, I'll share the four key strategies that have helped us team up in the kitchen.
Part 1: Choose Your King
Part 2: How to Divide and Conquer Your Cooking Labors
Part 3: Three Strategies to Create Personal Space in Your Kitchen
Part 4: Capitalize on Your Cooking Core Competencies
I hope this series of posts will encourage you and your family to team up in your kitchen too. We'll start today with Part 1.
*********************************
Part 1: Choose Your King
The fundamental problem most kitchen collaborations suffer from, and the fundamental problem Laura and I always had in our early days, was a battle for control. Maybe we'd successfully agree on what to cook, but once we actually began cooking we'd both attack the recipe full-force, giving out instructions and orders to each other. It was chaos. Two kitchen Napoleons simply cannot coexist in the same kitchen at the same time.
Eventually, one of us would win out and start controlling the direction of things. And of course the other person would usually be annoyed and feel like a second class citizen. Nobody was in charge, there was no succession plan, and we wasted a lot of energy fighting out a battle for control before we ever got down to cooking.
Finally, after staring one too many times at the business end of a paring knife, I came up with the "King" idea. "Hey," I said, "let's decide ahead of time who's the boss here. And don't worry, I'll just be King for a day. We'll take turns and you can be king the next time we cook."
What exactly does it mean to be "King" then? Think of the king as a kind of all-powerful general contractor for dinner. The king decides what to cook, and how it's going to be cooked. The king is responsible for completing the dish satisfactorily at a time agreed upon in advance with his or her subjects. The king also gets to delegate some of the work involved (but only some, as we'll see below), and figures out who should do what task and when.
We’ve found that allocating nearly complete powers to the King works well for us, but of course you can delineate the powers of your version of the king in a way that works best for you. The key point is that you should always choose your king together before starting up a recipe. You'll be stunned at how much smoother things go once that decision is out of the way.
And certainly it goes without saying that you need to take turns being king. We've settled into roughly a 60/40 split favoring me with kingly powers, but that’s only because I tend to do more of the cooking in our home.
Another king-related rule we have is this: if you come up with the meal idea, YOU get to be king. This makes being king a reward for dinner idea generation, as well as a reward for initiative. Of course, the king still typically ends up doing much of the work too, and that's deliberate: you want the pleasures of royalty to only slightly outweigh the burdens of command. You don't want the king to live off the backs of the serfs in some kind of kitchen feudalism. Thus, being king is a good thing, but not so good that you won't share the title next time around.
Another compelling idea would be to let your kids be king once in a while (after they’ve developed the basic skills of cooking of course). Imagine being a teenager and getting to order your parents to do prep work! Who knows, not only will this give your kids an extra opportunity to appreciate cooking, it could help them develop skills in management and leadership.
I'll be back in a couple of days with Part 2: How to Divide and Conquer Your Cooking Labors. Stay tuned!
Casual Kitchen's First Anniversary!
I've now reached my first anniversary blogging at Casual Kitchen, and I'd like to take a brief moment to thank all of my readers out there for reading, commenting and participating. It's been a privilege and a pleasure to write for you. I had no idea it would be so fun and personally satisfying to write a blog.
At its beginning in December 2006, this blog was obligatorily read by perhaps a dozen or so family members and friends. Today, Casual Kitchen often gets several hundred hits per day--not quite enough traffic to quit my day job, but certainly enough to make writing for this blog a deeply gratifying experience.
Thank you!
At its beginning in December 2006, this blog was obligatorily read by perhaps a dozen or so family members and friends. Today, Casual Kitchen often gets several hundred hits per day--not quite enough traffic to quit my day job, but certainly enough to make writing for this blog a deeply gratifying experience.
Thank you!
Shrimp in Garlic Sauce (Camarones Ajillo)
Thanks to my new girlfriend Daisy, I'd like to bring you yet another amazing (and amazingly easy) recipe: Camarones Ajillo, or Shrimp in Garlic Sauce.
This recipe, a classic Latin dish, passes the five easy questions test with flying colors and it is utterly delicious. I am always on the lookout for dishes like this that are easily made and uncomplicated, yet still somehow just a bit exotic--at least to my simple New Jersey palate. And of course I'm particularly partial to any recipe containing shrimp.
*********************
Shrimp in Garlic Sauce
Very slightly modified from Daisy Cooks! by Daisy Martinez
Ingredients:
1/3 cup extra-virgin olive oil
1 Tablespoon hot red pepper flakes
12 garlic cloves, sliced
2 pounds large or jumbo shrimp, peeled and de-veined
1/2 teaspoon sea salt or kosher salt
1/2 cup dry sherry
1/4 cup chopped flat-leaf parsley
Directions:
1) Heat the oil and red pepper flakes in a large non-stick skillet over medium-low heat just until the oil starts to color. Don't heat the red pepper flakes over high heat or they will discolor and turn the oil bitter. Stir in the garlic and cook, shaking the pan, just until the garlic begins to color, about 2 minutes.
2) Increase the heat to high, add the shrimp, and season them with 1/2 teaspoon of salt (see note 3 below). Stir the shrimp so they cook evenly until they turn pink. Keep an eye on the garlic. It will continue to brown, but don't let it burn. If it starts to darken, lower the heat and remove the pan from the heat for a few seconds.
3) When the shrimp are pink all over, pour in the sherry and bring it to a boil. Cook, stirring, until the shrimp are cooked through and the liquid has been reduced by about half and lightly thickened, about 3 minutes. Stir in the parsley. Scrape the shrimp and the sauce into a serving bowl and serve hot.
Serves 2-3.
************************
First, a few brief notes to add some extra context to how to make this recipe:
1) Be sure to use only high-quality ingredients for this dish, and be particularly sure to use only extra-virgin olive oil. As Daisy says in her book, simple recipes like this just don't give you anywhere to hide.
2) This is a textbook example where you need to read the recipe twice, because there are definitely some timing issues in the making of this dish. For example, if you flake out and don't already have the parsley rinsed, chopped, and at the ready when it comes time to add it in, you will have overcooked shrimp. Always make sure you have a sense of the "rhythm" of a recipe before you plunge in.
3) Long time readers of Casual Kitchen of course know that using excess salt is cheating. However, it is not cheating to use some salt in the particular case of this recipe (as is often true in cooking, a dash of moral relativism comes in handy on occasion...). I modified the recipe slightly to use half of the salt the recipe originally calls for, and found that just that small amount of salt is all it takes to concentrate the flavors of this the dish.
4) Regarding shrimp size: the recipe in its original form calls specifically for 10 jumbo shrimp, but almost any size shrimp will do here. Just make sure to use two pounds of shrimp in order to keep the ratio of ingredients in the recipe constant. Also, the smaller the shrimp, the shorter the cooking time for said shrimp. Be mindful of this variable--nobody wants to eat tough, overcooked shrimp.
Finally, I've added below some selected photos from the making of this dish, as Daisy's cookbook unfortunately does not contain any photos or illustrations of the steps of this particular recipe at all. It's one of the very few weaknesses of her cookbook.
This is the thickness you'll want with your sliced garlic:
 Hot pepper flakes and garlic simmering in oil:
 Chopping parsley. One pass cutting lengthwise and one pass cutting crosswise:
 Adding the shrimp:
 Serve with a mound of white rice in the center:

 Enjoy!
How can I support Casual Kitchen?
If you enjoy reading Casual Kitchen, tell a friend and spread the word! You can also support me by linking to me, subscribing to my RSS feed, or submitting this article, or any other article you particularly enjoyed here, to bookmarking sites like del.icio.us, digg or stumbleupon.
I'd like to bring you yet another amazing (and amazingly easy) recipe: Camarones Ajillo, or Shrimp in Garlic Sauce.This recipe, a classic Latin dish, passes the five easy questions test with flying colors and it is utterly delicious. I am always on the lookout for dishes like this that are easily made and uncomplicated, yet still somehow just a bit exotic--at least to my simple New Jersey palate. And of course I'm particularly partial to any recipe containing shrimp.
*********************
Shrimp in Garlic Sauce
Very slightly modified from Daisy Cooks! by Daisy Martinez
Ingredients:
1/3 cup extra-virgin olive oil

1 Tablespoon hot red pepper flakes
12 garlic cloves, sliced
2 pounds large or jumbo shrimp, peeled and de-veined
1/2 teaspoon sea salt or kosher salt
1/2 cup dry sherry
1/4 cup chopped flat-leaf parsley
Directions:
1) Heat the oil and red pepper flakes in a large non-stick skillet over medium-low heat just until the oil starts to color. Don't heat the red pepper flakes over high heat or they will discolor and turn the oil bitter. Stir in the garlic and cook, shaking the pan, just until the garlic begins to color, about 2 minutes.
2) Increase the heat to high, add the shrimp, and season them with 1/2 teaspoon of salt (see note 3 below). Stir the shrimp so they cook evenly until they turn pink. Keep an eye on the garlic. It will continue to brown, but don't let it burn. If it starts to darken, lower the heat and remove the pan from the heat for a few seconds.
3) When the shrimp are pink all over, pour in the sherry and bring it to a boil. Cook, stirring, until the shrimp are cooked through and the liquid has been reduced by about half and lightly thickened, about 3 minutes. Stir in the parsley. Scrape the shrimp and the sauce into a serving bowl and serve hot.
Serves 2-3.
************************
First, a few brief notes to add some extra context to how to make this recipe:
1) Be sure to use only high-quality ingredients for this dish, and be particularly sure to use only extra-virgin olive oil. As Daisy says in her book, simple recipes like this just don't give you anywhere to hide.
2) This is a textbook example where you need to read the recipe twice, because there are definitely some timing issues in the making of this dish. For example, if you flake out and don't already have the parsley rinsed, chopped, and at the ready when it comes time to add it in, you will have overcooked shrimp. Always make sure you have a sense of the "rhythm" of a recipe before you plunge in.
3) Long time readers of Casual Kitchen of course know that using excess salt is cheating. However, it is not cheating to use some salt in the particular case of this recipe (as is often true in cooking, a dash of moral relativism comes in handy on occasion...). I modified the recipe slightly to use half of the salt the recipe originally calls for, and found that just that small amount of salt is all it takes to concentrate the flavors of this the dish.
4) Regarding shrimp size: the recipe in its original form calls specifically for 10 jumbo shrimp, but almost any size shrimp will do here. Just make sure to use two pounds of shrimp in order to keep the ratio of ingredients in the recipe constant. Also, the smaller the shrimp, the shorter the cooking time for said shrimp. Be mindful of this variable--nobody wants to eat tough, overcooked shrimp.
Finally, I've added below some selected photos from the making of this dish, as Daisy's cookbook unfortunately does not contain any photos or illustrations of the steps of this particular recipe at all. It's one of the very few weaknesses of her cookbook.
This is the thickness you'll want with your sliced garlic:
 Hot pepper flakes and garlic simmering in oil:
 Chopping parsley. One pass cutting lengthwise and one pass cutting crosswise:
 Adding the shrimp:
 Serve with a mound of white rice in the center:
 Enjoy!
How can I support Casual Kitchen?
If you enjoy reading Casual Kitchen, tell a friend and spread the word! You can also support me by linking to me, subscribing to my RSS feed, or submitting this article, or any other article you particularly enjoyed here, to bookmarking sites like del.icio.us, digg or stumbleupon.
How to Make Your Own Inexpensive Sports Drink
I'd be remiss, after all of my diet and athletic training essays, if I didn't share this easy and inexpensive sports drink recipe from my Eat to Win guru, Robert Haas.
This recipe has served us very well over the years, even after the most grueling hot-weather workouts.
***************************
Quickfix
Modified slightly from Robert Haas' Eat To Win.
Combine:
8 ounces orange juice
8 ounces cold water
1/2 teaspoon salt
Stir well and drink.
***************************
Compared to Gatorade or Powerade at $2.00 to $2.50 for a 32-ounce bottle, this recipe is just as healthy at a fraction of the cost. Enjoy!
This recipe has served us very well over the years, even after the most grueling hot-weather workouts.
***************************
Quickfix
Modified slightly from Robert Haas' Eat To Win.
Combine:
8 ounces orange juice
8 ounces cold water
1/2 teaspoon salt
Stir well and drink.
***************************
Compared to Gatorade or Powerade at $2.00 to $2.50 for a 32-ounce bottle, this recipe is just as healthy at a fraction of the cost. Enjoy!
When High-Carb Diets Don't Work: Diet and Athletic Training Part 3
This is Part 3 of a three part series on diet and athletic training.
Part 1
Part 2
****************************
Laura: "Remember when you ran your first marathon? You looked emaciated back then."
Following our last post on the advantages of a high-carb/low-fat diet, we're going to talk today about a primary disadvantage of this diet: it tends to fail when used along with a heavy-duty training regimen.
Like I said last week, I took the Eat to Win lifestyle to heart while I was training for my first marathon. And during the first few months of training, when I was ramping from very light mileage to perhaps 20 miles a week, this diet worked fantastically. I had never felt better.
Moreover, this was back in my broke grad student days too, so the cost of the diet (or lack thereof) resonated with me as well. I was eating my quasi-vegetarian diet and having modest portions of meat perhaps once or twice a week. Normally this wouldn’t be a big problem if I had been overweight or was undertaking light to moderate exercise.
But I was not overweight to begin with, and I was training for a marathon. I was getting a little bit carried away with the pasta, quite frankly, and I wan't eating enough protein or fat. But why should I? I had never felt this fit before.
Unfortunately, things began to break down as I went above the 25 miles per week mileage level (this is the realm of medium-to-heavy distance training for a first-time novice marathoner). I simply didn’t respect the fact that I wasn’t taking in enough protein and fat for my body to maintain muscle mass and rebuild itself from training.
Don’t get me wrong, I was still fit. My body fat levels were lower than ever before, my resting pulse was 48 beats a minute, and my blood pressure numbers would typically be something like 107/57.
But I started to find myself struggling through runs. I had some training injuries, including a badly pulled calf muscle, and I was much more susceptible to getting sick. I caught a cold in September, and I came down with a bad case of bronchitis a week or two after finishing the marathon itself.
And therein is the primary “con” argument against high-carb/low-fat diets, especially when taken to an extreme, like I did: You just can’t cut your fat and protein intake down to a bare minimum while you’re under an aggressive endurance training regimen.
Because I too rigidly embraced a complex carbohydrate-based diet, my body wasn’t able to restore itself, and it wasn’t able to protect itself from injuries. You’ve got to replace what your body breaks down. When you are doing heavy, strenuous, and long term physical training, your body will be breaking down its fat cells and muscle cells. You have to ingest more protein--and yes, fat too--in order to replenish what your body is burning off.
This doesn’t mean you should head back to the junk food aisle and pick up a dozen bags of Doritos, but it does mean that you can and should take in more lean meats, perfectly boiled eggs, and even consider an occasional Polish kielbasa breakfast like the one we discussed the other day. During my heaviest training weeks for my second and third marathons, I actually drank soy- and whey-based protein shakes every day. This made an enormous difference in my overall strength, endurance and health--although I was kind of disappointed that I somehow never developed a body quite like the musclebound guy on the cover of the protein mix box.
The real lesson here is that everything (diet-wise or otherwise) must be done in moderation. For me, that meant listening to my body and thinking about my diet in the context of of the intensity of my exercise routine.
And that's the great thing about exercise, whether you do moderate workouts three times a week or if you’re doing heavy endurance training 5-6 days a week. It teaches you to pay attention to your body and give it what it needs, rather than shoveling food in first and asking questions later.
Part 1
Part 2
****************************
Laura: "Remember when you ran your first marathon? You looked emaciated back then."
Following our last post on the advantages of a high-carb/low-fat diet, we're going to talk today about a primary disadvantage of this diet: it tends to fail when used along with a heavy-duty training regimen.
Like I said last week, I took the Eat to Win
lifestyle to heart while I was training for my first marathon. And during the first few months of training, when I was ramping from very light mileage to perhaps 20 miles a week, this diet worked fantastically. I had never felt better.Moreover, this was back in my broke grad student days too, so the cost of the diet (or lack thereof) resonated with me as well. I was eating my quasi-vegetarian diet and having modest portions of meat perhaps once or twice a week. Normally this wouldn’t be a big problem if I had been overweight or was undertaking light to moderate exercise.
But I was not overweight to begin with, and I was training for a marathon. I was getting a little bit carried away with the pasta, quite frankly, and I wan't eating enough protein or fat. But why should I? I had never felt this fit before.
Unfortunately, things began to break down as I went above the 25 miles per week mileage level (this is the realm of medium-to-heavy distance training for a first-time novice marathoner). I simply didn’t respect the fact that I wasn’t taking in enough protein and fat for my body to maintain muscle mass and rebuild itself from training.
Don’t get me wrong, I was still fit. My body fat levels were lower than ever before, my resting pulse was 48 beats a minute, and my blood pressure numbers would typically be something like 107/57.
But I started to find myself struggling through runs. I had some training injuries, including a badly pulled calf muscle, and I was much more susceptible to getting sick. I caught a cold in September, and I came down with a bad case of bronchitis a week or two after finishing the marathon itself.
And therein is the primary “con” argument against high-carb/low-fat diets, especially when taken to an extreme, like I did: You just can’t cut your fat and protein intake down to a bare minimum while you’re under an aggressive endurance training regimen.
Because I too rigidly embraced a complex carbohydrate-based diet, my body wasn’t able to restore itself, and it wasn’t able to protect itself from injuries. You’ve got to replace what your body breaks down. When you are doing heavy, strenuous, and long term physical training, your body will be breaking down its fat cells and muscle cells. You have to ingest more protein--and yes, fat too--in order to replenish what your body is burning off.
This doesn’t mean you should head back to the junk food aisle and pick up a dozen bags of Doritos, but it does mean that you can and should take in more lean meats, perfectly boiled eggs, and even consider an occasional Polish kielbasa breakfast like the one we discussed the other day. During my heaviest training weeks for my second and third marathons, I actually drank soy- and whey-based protein shakes every day. This made an enormous difference in my overall strength, endurance and health--although I was kind of disappointed that I somehow never developed a body quite like the musclebound guy on the cover of the protein mix box.
The real lesson here is that everything (diet-wise or otherwise) must be done in moderation. For me, that meant listening to my body and thinking about my diet in the context of of the intensity of my exercise routine.
And that's the great thing about exercise, whether you do moderate workouts three times a week or if you’re doing heavy endurance training 5-6 days a week. It teaches you to pay attention to your body and give it what it needs, rather than shoveling food in first and asking questions later.
Subscribe to:
Posts (Atom)