Showing posts with label Recipe-a-day. Show all posts

29 Easy, Inexpensive Recipes From the Recipe a Day Trial [FULL ARCHIVE]

For your convenience, readers, here's a full archive of every single recipe from June's Recipe A Day trial. Enjoy!

#1: Seared Curried Scallops with Coconut Rice
#2: Shaksouka
#3: Spicy Tuna, Tomatoes and Red Beans
#4: Sauteed Kale in Coconut and Lime Sauce
#5: Green Apple Charoset
#6: Vinegar Braised Chicken and Onions
#7: Crisp Tofu with White Beans and Gremolata
#8: Easy Lemon-Lime Quinoa
#9: "Almost Meatless" Potato Corn Chowder
#10: Laura's Secret Hummus

#11: Easy Tomato Curry
#12: Garden Pasta with Chickpeas and Garlic Oil
#13: Spicy Crock Pot Spare Ribs
#14: Sardine Superfood Salad
#15: Spicy Spanish Potato Onion Soup
#16: Warm Asian-Style Sesame Spinach Salad
#17: Citrus Braised Chicken and Root Vegetables
#18: Homemade Cherry Pie
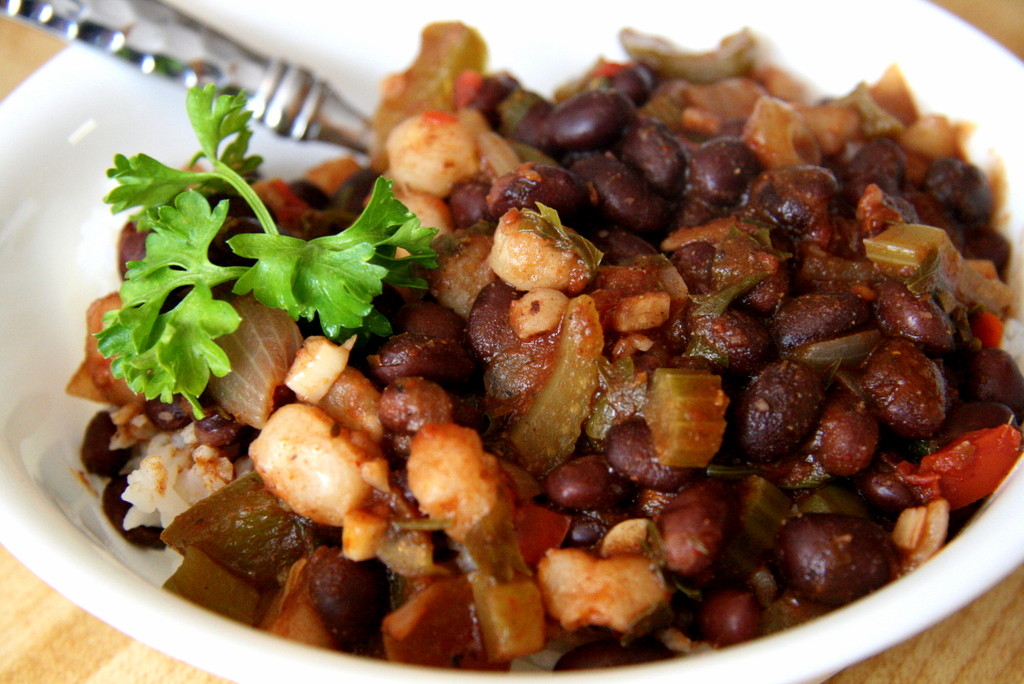
#19: Black Bean and Giant White Corn Posole
#20: Spicy Asian-Style Slow Cooker Spare Ribs

#21: Savory Baked Chickpeas and Garlic
#22: Easy Zucchini Coin Soup
#23: Easy Marinated White Bean Casserole
#24: Spicy Mote and Chicken Stew
#25: Easy Red Pepper and Hazelnut Spread
#26: Mote Con Huevos
#27: Savory Blueberry Rice
#28: Broccoli and Elbow Pasta Frittata
#29: Paul Prudhomme-Style Fried Catfish


How can I support Casual Kitchen?
Easy. Do all your shopping at Amazon.com via the links on this site! You can also link to me or subscribe to my RSS feed. Finally, consider sharing this article, or any other article you particularly enjoyed here, to Facebook, Twitter (follow me @danielckoontz!) or to bookmarking sites like reddit, digg or stumbleupon. I'm deeply grateful to my readers for their ongoing support.

Recipe A Day #29: Paul Prudhomme-Style Fried Catfish

We're at the end of one of the most aggressive experiments I've done here at Casual Kitchen: 29 brand new recipes, shared daily with readers over the course of the entire month of June.

And today, for our final recipe of my recipe-a-day trial, we're going to feature a chef who has influenced me substantially over the years: Paul Prudhomme, and his exceptional cookbook Chef Paul Prudhomme's Louisiana Kitchen.

Paul Prudhomme is of course a legend for teaching the world about Louisiana Cajun and Creole cuisine, and we've featured him here at Casual Kitchen a few times over the years: with his palate-searing Cajun Meatloaf, his stunning Barbecued Shrimp, his not-easy-but-still-worth-it Shrimp Creole, and of course his simple and staggeringly good Chocolate Mousse.

And today's recipe is one of my favorites. It's easy, and it has all the exciting flavors and spices that you'd expect from Paul Prudhomme. It'll be one of your favorites too, I'm sure of it.


Paul Prudhomme-Style Fried Catfish

Ingredients:
2.5 pounds catfish filets, frozen or fresh
Vegetable or corn oil for deep frying

Spice mix: Combine well:
1 Tablespoon salt
1 Tablespoon cayenne pepper
1 Tablespoon paprika
1 Tablespoon garlic powder
1 Tablepoon black pepper
1½ teaspoons onion powder
1½ teaspoons oregano
1½ teaspoons thyme

Dredge pans:
Dredge pan #1: 1 cup flour plus 1½ teaspoons seasoning mix above, combined well.
Dredge pan #2: 2 eggs, 1 cup milk, and ¼ cup mustard, whisked/combined well.
Dredge pan #3: 2 cups flour, 1.5 cups cornmeal, plus 2 generous Tablespoons of the seasoning mix above, combined well.

Directions:
1) Prepare dredge pans according to instructions above, using three small loaf pans or pie pans.

2) Use remaining seasoning mix to liberally season both sides of each of the fish filets, then cut catfish filets into nugget-sized pieces, about 2-3 inches long and 1 inch wide.

3) Pour oil in a large pan so you have enough to be about 3 inches deep. Heat oil to around 300F or until smoking just slightly. Meanwhile, set up an assembly line with the fish, the three dredging pans and the frying oil (see photo below).


4) Dredge the fish pieces first in Dredge pan #1, next in Dredge pan #2 (the egg mixture), and then, finally, in Dredge pan #3 (flour/cornmeal mixture), making sure you really press the flour/cornmeal mixture firmly into the fish with your fingers or a spoon. Fry the fish in batches of five or six pieces at a time, until golden brown and crispy. Place on paper towels to drain, and serve with a side of vegetables, Lemon-Lime Quinoa, or Savory Blueberry Rice.

Serves 5-6.
******************************
Recipe Notes:
1) Easier than it looks: This recipe at first seems complicated, but it really isn't. There's just a little bit of arrangement involved in setting up your fish dredging/frying assembly line, but other than that this recipe is shockingly easy.

2) Intimidated by fish? I've said elsewhere, probably repeatedly, that I'm often intimidated cooking fish. I cook it for too long, I don't cook it long enough, and because it's a relatively costly food, I feel, I don't know, like a wasteful moron when it doesn't come out perfectly. If you feel the same, do not fear this recipe. I promise you: it's almost impossible to screw up. The fish nuggets have very wide tolerances for cooking time. You'll know when the breading becomes a luscious golden brown that the fish inside is done--and done perfectly.

3) Thoughts on scale: When I cook here at Casual Kitchen, I usually cook for just the two of us. This recipe, with a generous side of Savory Blueberry Brown Rice, (over)fed us for two dinners plus two lunches for Laura to take to work. However, a minor problem with this recipe--a problem common to any recipe where you bread and fry something--is that the breading gets soggy the next day. If you're cooking for two, make the recipe as it is above, but save back half of the fish filets for day two and fry them then. And then, for a time- and effort-saving tip, put the breading/dredging materials into plastic storage containers--just put a lid on each container and stack it in your fridge for re-use with the rest of the fish the following day. And, let the oil cool on your stove and you can re-use that too!

4) Save the spice mix and egg mixture: When you're done with this recipe you'll have some leftover spice mix and some leftover egg mixture. Do not throw them away!! Save the spice mix for other dishes: I sprinkle it over my morning eggs for example, and to mess with Laura's head, once in a while I'll put a generous shake or two of Paul Prudhomme onto her oatmeal. Also, a suggestion for any leftover egg mixture from Dredge pan #2: add a couple of Tablespoons of it to your next batch of scrambled eggs for a delicious taste experience. PS: You can also freeze the egg mixture.

5) This is the end: Finally, readers, I hope you enjoyed my June Recipe A Day experiment, and thank you for coming along for the ride with me. It was hard work, but very much worth it: Laura and I ate really well last month, and we've got quite a few new recipes that we'll likely add to our cooking rotation. I hope you got some new recipes out of it too! I'll put together an archive post and a summary post with the best and most popular recipes in the coming weeks.


How can I support Casual Kitchen?
Easy. Do all your shopping at Amazon.com via the links on this site! You can also link to me or subscribe to my RSS feed. Finally, consider sharing this article, or any other article you particularly enjoyed here, to Facebook, Twitter (follow me @danielckoontz!) or to bookmarking sites like reddit, digg or stumbleupon. I'm deeply grateful to my readers for their ongoing support.

Recipe A Day #28: Broccoli and Elbow Pasta Frittata

Readers, we're really getting down to the end of June's Recipe A Day trial, and today's recipe, a simple but not-quite-ordinary frittata, is a textbook type of dish you'll find here at Casual Kitchen.

We've seen frittata recipes elsewhere here at CK, and in fact one of our frittata recipes dates back to the earliest days of CK (uh, and it shows). What's so great about frittatas? They’re easy, they're inexpensive, and you can put into it practically whatever foods you happen to have on hand. Best of all it's a complete, balanced meal.

And (assuming there's any left over) a wedge of frittata microwaves perfectly the next day... providing yet another delicious meal in just seconds.

Today's Broccoli and Elbow Pasta Frittata has yet another twist: with the elbow pasta it's almost a cross between a frittata and mac and cheese! You're going to love it.

Broccoli and Elbow Pasta Frittata

Ingredients:
1 cup elbow pasta, cooked
about 1 -1.5 cups broccoli florets, steamed
2-3 Tablespoons oil
1 onion
5-8 ounces of meat of your choice, chicken, sausage, etc., optional
7 eggs
¼ cup milk
½ teaspoon salt
½ teaspoon black pepper
¼ to ⅓ cup parmesan cheese

Directions:
1) Cook pasta according to directions and also steam broccoli florets until just cooked to your liking.

2) Place eggs, salt, black pepper and milk in a separate bowl. Whisk until well-combined.

3) Meanwhile, in a large, deep, non-stick pan, saute onion (and optional meat) in oil on medium-high heat until onion is soft and beginning to brown and meat is cooked through. Then, add cooked pasta, steamed broccoli and parmesan cheese to pan. Combining well and make sure everything is well-heated through.

4) Next, add egg mixture to pan, shaking and tilting pan so the eggs are well distributed throughout. Cover and cook on medium heat for 7-10 minutes, until the frittata sets. Then place pan, uncovered, about 3-4 inches below your oven's broiler for an additional 7-10 minutes, until the frittata is fully cooked through and beginning to brown on top.

Serves 4.
**************************************
Recipe Notes:
1) Meat or meatless ideas: Another key advantage of frittatas is you can make them with or without meat--either way, it's a complete meal. We've made this recipe the first time with sliced-up spicy Italian sausage, and the second time with cubes of boneless chicken thighs. In both cases we simply sauteed the meat with the onions. Obviously you could use pork, beef, beans or even tofu in this recipe too.

2) Spicing variations: Some spicing ideas:

* A minimalist frittata with simple black pepper and salt
* Spicy southwest version: cayenne, mild chili powder and cumin
* Poultry lover's special: thyme and poultry seasoning
* Italian lover's special: with extra basil and oregano
* Fresh garden herbs: fresh parsley and fresh basil, chopped and added to the egg mixture.

3) Oven-safe pan? The pan we used is technically not oven-safe, but you really don't need an oven-safe pan to do the few minutes of broiling required of this recipe. Our solution is simply to leave the oven door partially open and have the pan handle sticking outside the oven so it isn't exposed to the broiler's heat. The potentially meltable pan handle will be perfectly safe over the few minutes the frittata is in there. If you look at the last photo in my How to Make a Simple Frittata post you'll see exactly what I mean.


How can I support Casual Kitchen?
Easy. Do all your shopping at Amazon.com via the links on this site! You can also link to me or subscribe to my RSS feed. Finally, consider sharing this article, or any other article you particularly enjoyed here, to Facebook, Twitter (follow me @danielckoontz!) or to bookmarking sites like reddit, digg or stumbleupon. I'm deeply grateful to my readers for their ongoing support.

Recipe A Day #27: Savory Blueberry Rice

Today we feature a side dish that takes regular old rice and makes it into something truly special. We've adapted and simplified a similar recipe from Mollie Katzen's exceptional new cookbook The Heart of the Plate (you can find her original version on page 200). Mollie's recipe was already easy: what we've done here at CK is adapt it to make it both more pantry-friendly and even lower cost. Wait until you see the look on your guests' faces when you put a stunning plate of this electric blue rice in front of them!

PS: Have a look also at CK's great list of easy rice side dishes!

Savory Blueberry Rice

Ingredients:
2-3 Tablespoons butter or olive oil
2 cups brown rice
4 cups water

1 onion
2 Tablespoons butter or olive oil
10-12 ounces frozen unsweetened blueberries
salt and black pepper, to taste
lime juice, to taste

Directions:
1) Cook the brown rice: place rice, butter/oil and water in a large pot, bring to a boil, reduce heat to a simmer and cook, covered, for about 40 minutes until rice is done to your liking.

2) Meanwhile, in a separate pan, saute onion in butter/oil on medium-high heat until soft and beginning to brown. Add frozen blueberries and continue to saute until blueberries thaw and begin to release their juices. Continue sauteing for 7-10 minutes until blueberries thicken and have a sauce/jam-like texture. Turn off heat and let stand until rice is done.

3) When rice is done, fluff well with a fork and add blueberry mixture. Combine well, then add salt, black pepper and lime juice to taste. Serve immediately.

Serves 6-7 as a side dish.
****************************************


Recipe Notes:
1) Mild taste, stunning visuals: This is not supposed to be a loud-tasting dish. It's basically just... rice, except that it looks really, really cool and it has an unusual, nuanced set of flavors. However, if nuance isn't enough for you and you'd prefer a more aggressive spicing and flavoring, see the following note.

2) Spicing options: Don't want to settle for "quiet" rice? Some ideas:

* Add two cubes of bouillon to the rice before cooking.
* Add 3/4 teaspoon Tabasco or cayenne pepper for a spicy variation.
* Add shredded parmesan or mozzarella for a risotto-esque variation.
* Add seared chicken, browned sausage or beans to make this into a main dish.


How can I support Casual Kitchen?
Easy. Do all your shopping at Amazon.com via the links on this site! You can also link to me or subscribe to my RSS feed. Finally, consider sharing this article, or any other article you particularly enjoyed here, to Facebook, Twitter (follow me @danielckoontz!) or to bookmarking sites like reddit, digg or stumbleupon. I'm deeply grateful to my readers for their ongoing support.

Recipe A Day #26: Mote Con Huevos

Today's recipe takes everyday plain old scrambled eggs and--with a minor extra step and an extra ingredient or two--turns them into a memorable and exotic breakfast. We loved this recipe, and you're going to love it too.

Mote Con Huevos

Ingredients:
2 Tablespoons butter (or oil)
1 small onion, chopped
2 garlic cloves, chopped finely
¼ teaspoon cayenne pepper or red pepper flakes
¼ teaspoon cumin
¼ teaspoon mild chili powder
salt and black pepper to taste
1 15 ounce can white hominy/mote, drained and rinsed
⅓ cup milk
5 eggs
2 Tablespoons chives, minced
1 Tablespoon fresh parsley, chopped

Directions:
1) In a medium-sized non-stick pan, saute the onion, garlic and spices in butter on medium-high heat for 5-7 minutes, until soft. Add mote/hominy, combine well, and saute for another 2 minutes. Then, add milk and continue to saute until nearly absorbed, another 3 minutes or so.

2) Meanwhile, whisk eggs well in a separate bowl. Add eggs, chives and parsley to pan. Cook and stir occasionally as if you were going to make scrambled eggs, until eggs are done to your liking. Serve immediately.

Serves 2-3.
*************************************


Recipe Notes:
1) Use real butter*: Sure, you can use plain olive oil or some other oil in this recipe, but there's something about the flavor combination of mote, eggs and butter. With butter, this recipe simply tastes better.

* Apologies to Jen Yu for stealing the phrase.

2) Canned vs. dried mote/hominy/giant white corn: Once again, you have a choice with today's recipe: use dried giant white corn, or simply buy it in the can. With this recipe--contrary to our recent Spicy Mote and Chicken Stew--I recommend going the easier route and using basic canned hominy or canned mote, which you can find the latin aisle in most grocery stores. Barring that, today's recipe offers you a gift-wrapped reason to visit your local Latin American grocery store.

3) Spice variations: Feel free to improvise with the spices here: In place of my "cayenne, cumin and mild chile powder" version above, consider using thyme and sage, or paprika only, or a super-spicy version with extra cayenne and Tabasco, or, a simple, minimalist version with just salt and black pepper.


How can I support Casual Kitchen?
Easy. Do all your shopping at Amazon.com via the links on this site! You can also link to me or subscribe to my RSS feed. Finally, consider sharing this article, or any other article you particularly enjoyed here, to Facebook, Twitter (follow me @danielckoontz!) or to bookmarking sites like reddit, digg or stumbleupon. I'm deeply grateful to my readers for their ongoing support.

Recipe A Day #25: Easy Red Pepper and Hazelnut Spread

This is an interesting, nuanced and rich-tasting spread that--with a little bit of practice--you can put together in just a few minutes. It's adapted from one of my go-to cookbooks for easy recipes, a cookbook we've seen repeatedly in this month's Recipe A Day trial: Jules Clancy's brilliant Five Ingredients Ten Minutes.

And to really wow your guests with delicious spreads and dips, consider pairing this electric orange spread with a striking-looking batch of Easy Beet Pesto and yet another batch of Laura's Secret Hummus!

Easy Red Pepper and Hazelnut Spread

Ingredients:
7-8 ounces chopped hazelnuts (about 200g)
7-8 ounces roasted red peppers, well drained (about 200g)
2 garlic cloves
about 2 Tablespoons red wine vinegar
about 2 teaspoons paprika
½ teaspoon salt, more or less to taste
about 4-5 Tablespoons olive oil, to taste/texture

Directions:
1) Place nuts, roasted red peppers, garlic cloves, paprika and vinegar in a food processor and combine well.

2) Add olive oil and salt gradually, until the spread reaches your desired taste and texture. Serve with carrots, celery, crackers and other vegetables of your choice.

Serves 6 as an appetizer.
******************************


Recipe Notes:
1) This is a dense, rich and thick dip. Even after you add four or five tablespoons of olive oil, it will still be relatively dense, with a mortar-like texture. I wish I could come up with a more appetizing word than "mortar," but here at CK we seek exactitude in our descriptive terminology.

2) Substitutions: Feel free to use walnuts or even pecans in place of hazelnuts. Note that a typical US grocery store will carry chopped walnuts and chopped hazelnuts right next to each other in the baking aisle. Typically pecans will be the most expensive, while walnuts and hazelnuts should cost roughly the same. Often the "chopped" versions of these nuts are less expensive than the whole nuts, so there's no need to pay extra for whole nuts--you're just going to pulverize these puppies anyway.

3) Nut allergies: If you have any enemies with severe nut allergies, this would be a great appetizer to serve them.


How can I support Casual Kitchen?
Easy. Do all your shopping at Amazon.com via the links on this site! You can also link to me or subscribe to my RSS feed. Finally, consider sharing this article, or any other article you particularly enjoyed here, to Facebook, Twitter (follow me @danielckoontz!) or to bookmarking sites like reddit, digg or stumbleupon. I'm deeply grateful to my readers for their ongoing support.

Recipe A Day #24: Spicy Mote and Chicken Stew

Since the other day's Black Bean and Giant White Corn Posole recipe was such a hit, I've been trying to think up other ways to work giant white corn into a recipe. Today I bring you exactly that: a spectacularly delicious and interesting soup that's both easy and inexpensive. In fact, you can put this recipe together for a laughably cheap 60c per serving. Enjoy!

Spicy Mote and Chicken Stew

Ingredients:
1 14-16 ounce package of giant white corn/mote pelado
Water for soaking
About 10 cups water for the soup

5 Tablespoons olive oil
2 onions, chopped coarsely
3-4 cloves garlic, chopped
1 teaspoon cayenne pepper (to taste)
1 teaspoon cumin
1 teaspoon mild chili powder
About 1 pound boneless chicken thighs, chopped into cubes
14.5 ounce can diced tomatoes
2 chicken bouillon cubes
salt/black pepper to taste

Directions:
1) Soak the mote/giant white corn overnight in a large soup pot with plenty of water. Drain, then add 10 cups new water to the pot and boil for about 90 minutes, until corn is soft to the bite and the kernels are just beginning to "pop." (Note: cooking time may vary here, anywhere from a little over an hour to as much as two hours. Just test the corn occasionally and look for the kernels to begin breaking open).

2) Meanwhile, in a separate saute pan, saute onions in oil for a couple of minutes on high heat. Add spices, chicken and garlic, reduce heat to medium high, and saute until chicken is nearly cooked, about 5-8 minutes. Then, add diced tomatoes and bouillon cubes, simmer for another 5 minutes or so.

3) Add onions, garlic, chicken and tomato mixture to the soup pot, bring to a boil, and then simmer for another 10-15 minutes. Serve with rice or brown rice.

Serves 10.
*******************************************
Recipe Notes:
1) On finding Mote/Giant White Corn: Many well-stocked grocery stores will carry dried mote in the "Latin foods" aisle. Goya is a typical brand. Or, you may find it it next to the dried beans and lentils. If not, then this recipe gives you an excellent excuse to visit a local ethnic grocer in your community.

2) An obvious way to make this recipe easier and less time consuming would be to use canned hominy/giant white corn in place of dried (note that our Black Bean and Giant White Corn Posole does just that). To get the conversion about right, I'd use four 15 ounce cans of canned white corn to equate to a 14-ounce to 16-ounce bag of dried giant white corn. Simply drain the canned hominy/giant white corn, put it into a pot of about 10 cups water, bring to a boil, add the other ingredients, and then simmer for 20-25 minutes to let the spices and flavors combine well.

3) Here's a rundown of the cost:

14 oz Goya Giant white corn/mote pelado 1.89
1 pound boneless chicken thighs 1.99
2 onions 60c
3-4 garlic cloves 15c
Oil/spices ~25c
14.5 ounce can diced tomatoes 79c
2 chicken bouillon cubes: ~15c

Total cost: about 5.82, or less than 60c per serving.


How can I support Casual Kitchen?
Easy. Do all your shopping at Amazon.com via the links on this site! You can also link to me or subscribe to my RSS feed. Finally, consider sharing this article, or any other article you particularly enjoyed here, to Facebook, Twitter (follow me @danielckoontz!) or to bookmarking sites like reddit, digg or stumbleupon. I'm deeply grateful to my readers for their ongoing support.

Recipe A Day #23: Easy Marinated White Bean Casserole

This easy, healthy and hilariously cheap recipe costs less than 40c (!!) a serving. The deeper I get into this 30 day trial of trying new recipes, the more I can clearly see: there's literally an unlimited supply of recipes out there that can simply make you laugh out loud at how good and cheap they are.

Also, we've got a bonus protip in today's post on how to do a conversion of dried beans to canned beans, as well as the reverse: how to convert an amount of canned beans to an equivalent amount of dried beans. Read on to see.

Easy Marinated White Bean Casserole

Ingredients:
2 cups dried white beans
Water, for soaking, and then more water for cooking the beans
2 bay leaves

¾ cup olive oil
¾ cup vinegar
4-5 Tablespoons chopped fresh parsley
2 garlic cloves, finely minced
1 teaspoon dried oregano
1 teaspoon dried basil
1 teaspoon dried tarragon
1/4 to 1/2 teaspoon hot red pepper flakes, optional
salt and plenty of black pepper, to taste

Directions:
1) Cook the dried beans: soak overnight in a large pot in plenty of water, drain, then add new water and bring to a boil. Simmer with bay leaves for about 1 hour to 1.5 hours, until beans are done and just beginning to break up. Drain beans, remove bay leaves, and place beans into a casserole dish.

2) Meanwhile, combine all the other ingredients into a marinade. Pour over beans, combine well, and then refrigerate for 8 hours or overnight. Can be served warmed or cold.

Serves 8-10.
*****************************


Recipe Notes:
1) Canned beans vs dried: The most obvious time-saving recipe adaptation here would be to use canned beans in lieu of dried. Feel free! But there is a texture difference between dried and canned beans and honestly, I think I'd prefer doing this recipe "the hard way" and using dried. But feel free to try it either way.

2) Dried beans to canned beans conversion: Okay, which brings us to our next point: How do you know how many canned beans to use to equate to, say, 1 cup of dried beans?

It's easy: 1 cup of dried beans yields about 3 cups beans once cooked. This equates to two standard 14.5 ounce cans of canned beans. Therefore, our formula for conversion looks like this:

1 14.5-ounce can of beans = ½ cup dried beans = 1.5 cups cooked beans.
2 14.5-ounce cans of beans = 1 cup dried beans = 3 cups cooked beans.

Thus, to make today’s recipe, you would use four 14.5-ounce cans of beans in place of two cups of dried beans. Simple!

3) Spicing variations: Feel free to make a spicy version (add an extra 1 teaspoon to 1 Tablespoon of Tabasco or other hot sauce, depending on your masochism), or to play with other spice combinations. In place of the spicing mix above of basil/oregano/tarragon you could substitute a teaspoon each of thyme and black pepper, or for the daring, an electric yellow, middle eastern version: 1 teaspoon cumin, ¾ teaspoon cinnamon, and ½ teaspoon turmeric.

4) Cost per serving:

2 cups beans: 1.49
oil: 50c
vinegar: 10c
spices: 20c
garlic: 15c
parsley: 50c

Total: About $2.94, or less than 40c per serving.


How can I support Casual Kitchen?
Easy. Do all your shopping at Amazon.com via the links on this site! You can also link to me or subscribe to my RSS feed. Finally, consider sharing this article, or any other article you particularly enjoyed here, to Facebook, Twitter (follow me @danielckoontz!) or to bookmarking sites like reddit, digg or stumbleupon. I'm deeply grateful to my readers for their ongoing support.

Recipe A Day #22: Easy Zucchini Coin Soup

This recipe was inspired by Jules Clancy's amazing cookbook Five Ingredients Ten Minutes, and if I haven't convinced you to add this incredibly useful cookbook to your kitchen, I simply haven't been doing my job properly.

Today's soup recipe is easy, budget-friendly and stunningly delicious. I hope you enjoy it as much as we did.

Easy Zucchini Coin Soup

Ingredients:
4 Tablespoons olive oil
3-4 medium zucchini, cut into ¼ inch thick coins
2-3 garlic cloves, sliced into thin slices
About 1 liter or about 5 cups of stock, or 5 cups water plus 2 bouillon cubes
Small handful of fresh basil leaves
salt/pepper to taste
about ¼ to ⅓ cup finely grated parmesan cheese

Directions:
1) Saute zucchini coins in a large, deep non-stick pan on high heat until browned on both sides (you can do the zucchini in a few separate batches). Remove zucchini from pan and set aside.

2) Add a small amount of extra olive oil and saute the garlic on medium heat until partly browned.

3) Add zucchini back to pan, then add water/stock/bouillon, basil leaves and salt/pepper. Bring to a brief boil, remove from heat. Add grated parmesan cheese and combine well. Serve in bowls garnished with slivers of parmesan cheese.

Serves 5-6.
*****************************************


Recipe Notes:
1) Browning the zucchini: Browning the zukes adds both pleasing aesthetics and a nuanced flavor to the soup. Time-saving tip: Feel free to sear/brown just a portion of the zucchini disks, then add the rest of the zucchini to your pan for a brief saute before removing. This can save perhaps five minutes of cooking time with little sacrifice of taste.

2) Do not skip the parmesan! Somehow this simple ingredient, which seems like an afterthought to this recipe, adds a delicious flavor to this soup. Money-saving tip: pair this recipe with Day #9's "Almost Meatless" Potato Corn Chowder, and buy just one small block of parmesan cheese: use the rinds in the chowder and the cheese itself in today's recipe.

3) What the heck is a courgette? If you look in Jules' cookbook for the recipe that inspired this post (it's right there on page 28), you'll see a recipe for "Courgette and Basil Soup." Laura and I are often staggeringly ignorant, and a few years ago during a visit to New Zealand, we saw the word courgette for the first time, thinking it was kind of new hipster veggie that we'd never heard of (things like ramps and rocket come to mind for zero reason whatsoever). Later, however, we learned courgette is the French word for zucchini--and Kiwis, Aussies and the English just happen to use the French word for this and a few other vegetables. Hmmm. I don't know. Seems a little prissy to me. ;)


How can I support Casual Kitchen?
Easy. Do all your shopping at Amazon.com via the links on this site! You can also link to me or subscribe to my RSS feed. Finally, consider sharing this article, or any other article you particularly enjoyed here, to Facebook, Twitter (follow me @danielckoontz!) or to bookmarking sites like reddit, digg or stumbleupon. I'm deeply grateful to my readers for their ongoing support.

Recipe A Day #21: Savory Baked Chickpeas and Garlic

This is a really easy and healthy recipe that I adapted from a one of the oldest and most earnest cookbooks in my cookbook collection: Anna Thomas' The Vegetarian Epicure. The version I've created for you today only takes just a few minutes of prep plus a few minutes of sauteing. Then, just put the dish into the oven and wait. Enjoy!

Savory Baked Chickpeas and Garlic

Ingredients:
3 Tablespoons olive oil
1 medium onion, chopped into slivers
1 small green bell pepper, chopped into matchstick-size slivers
4 cloves garlic, minced or pressed
1 14.5 ounce can diced tomatoes
1 teaspoon tarragon
salt and black pepper, to taste
3-4 Tablespoons fresh parsley, chopped
2 14.5 ounce cans chickpeas, drained and well-rinsed

Directions:
1) Saute onion and green pepper in oil in a large skillet on medium-high heat for 3-4 minutes, until softening. Add minced/pressed garlic, saute another 3-4 minutes. Meanwhile, preheat your oven to 325F/160C.

2) Add diced tomatoes, tarragon, salt/black pepper and parsley, and saute for another 3-4 minutes. Add chickpeas, combine well and saute/simmer until well-heated through.

3) Transfer everything to a casserole dish, cover, and bake at 325F/160C for 50 minutes to 1 hour. Serve right out of the oven or cold.

Serves 4 as an entree, 5-6 as a side dish.
*********************************


Recipe Notes:
1) Once again, this recipe simply cries out for adaptations. Consider different spicing ideas: basil in place of tarragon, or cayenne pepper, or poultry seasoning or thyme/sage for a few ideas for different flavor sets. You could add a topping of parmesan or mozzarella cheese for an interesting and delicious effect. Or, you could also add meat and make this dish into sort of a Cassoulet: consider dark meat chicken, or large chunks of sausage. And so on.

2) An ethical dilemma: I always wonder if authors of vegetarian cookbooks like Anna Thomas' The Vegetarian Epicure or Jay Solomon's Vegetarian Soup Cuisine are ever offended or have their feelings hurt when somebody adapts their recipes by adding meat. This is the kind of stuff that keeps me up at night.

3) Cost: I'm sure readers won't be surprised to find out that this recipe is laughably cheap, and for the gazillionth time we utterly disprove the ludicrous assertion that it costs a lot to eat healthy.

chickpeas, 2 cans: 1.38
diced tomatoes: 59c
onion: 25c
green pepper: 95c
garlic: 20c
oil/spices: 25c

Total: 3.62, or about 91c per serving.


How can I support Casual Kitchen?
Easy. Do all your shopping at Amazon.com via the links on this site! You can also link to me or subscribe to my RSS feed. Finally, consider sharing this article, or any other article you particularly enjoyed here, to Facebook, Twitter (follow me @danielckoontz!) or to bookmarking sites like reddit, digg or stumbleupon. I'm deeply grateful to my readers for their ongoing support.

Recipe A Day #20: Spicy Asian-Style Slow Cooker Spare Ribs

My last recipe experiment with spare ribs in the crock pot was so amazing and so delicious that I simply had to try another. And fortunately, the sale on spare ribs in my local grocery store's circular hadn't yet expired. So, in true Early Retirement Extreme fashion, I took the opportunity once again to exploit a doorbuster sale food item and build an easy meal around it.

This time I created a simple Asian-style rub recipe with both sweet and spicy flavors. You'll love it.

Spicy Asian-Style Slow Cooker Spare Ribs

Wet Rub:
⅓ cup brown sugar
3 Tablespoons kosher salt
3 Tablespoons oil (canola, olive, peanut or sesame oil, your choice)
3 Tablespoons hoisin sauce
1 Tablespoon Chinese five-spice
2 teaspoons Thai chili paste or cayenne pepper

Ingredients:
1/2 to 3/4 cup water or stock
1 large onion, chopped very coarsely
4-5 garlic cloves, chopped coarsely
3-4 pounds spare ribs, cut up
2 Tablespoons vinegar

Directions:
1) Combine wet rub ingredients in a bowl. Coat spare ribs well with rub and set aside.

2) Place water, onions and vinegar in the bottom of crock pot, place spare ribs on top, and place chopped garlic over the meat for a decorative look. Cook for 4-5 hours on your slow cooker’s high setting, or 8-10 hours on low, until meat is done to your liking.

3) Serve over rice. Ladle onions, garlic and liquid from the crockpot over the top of each plate.

Serves 5-6.


How can I support Casual Kitchen?
Easy. Do all your shopping at Amazon.com via the links on this site! You can also link to me or subscribe to my RSS feed. Finally, consider sharing this article, or any other article you particularly enjoyed here, to Facebook, Twitter (follow me @danielckoontz!) or to bookmarking sites like reddit, digg or stumbleupon. I'm deeply grateful to my readers for their ongoing support.

Recipe A Day #19: Black Bean and Giant White Corn Posole

This is a delicious, easy and nutritious stew that you can make in about 35 minutes at a hilariously cheap per-serving cost of 85 cents. The original inspiration for this recipe comes from Jay Salomon and his incredibly useful cookbook Vegetarian Soup Cuisine: 125 Soups and Stews from Around the World. I've adapted it by simplifying it even more and making it even more pantry friendly. You're going to love it.

Black Bean and Giant White Corn Posole

Ingredients:
3-4 Tablespoons olive oil
1 onion, coarsely chopped
1 green bell pepper, coarsely chopped
2-3 cloves garlic, chopped
2 stalks celery, chopped
2 teaspoons dried oregano
2 teaspoons cumin
2 teaspoons mild chili powder
½ teaspoon black pepper
salt, to taste
hot red pepper flakes, to taste (optional)
1 14.5 ounce can crushed tomatoes
1 14.5 ounce can giant white corn/white hominy, drained and rinsed
2 14.5 ounce cans black beans (not drained)
3-4 Tablespoons chopped fresh parsley
about ¾ cup water

Directions:
1) In a large deep skillet or soup pot, add oil, onion, green pepper, garlic, celery and spices (oregano, cumin, chili powder, black pepper and optional salt and hot pepper flakes). Saute everything on medium-high heat for 7-10 minutes until soft.

2) Add white corn/hominy, crushed tomatoes, the black beans (along with black bean liquid), fresh parsley and water. Bring to a boil, reduce heat and simmer for 20 minutes, taking care to stir from time to time to prevent the stew from sticking to the bottom of the pan. Serve with rice, brown rice or warm tortillas.

Serves 6-7.
*******************************************
Recipe notes:
1) Drained white corn, undrained black beans: To make sure there's no confusion, note that we retain and use the liquid from the canned black beans, but we rinse and drain the white corn.

2) Thickness: This is supposed to be a thick soup, almost like a chili in texture, so add the extra water with this in mind. Also note that the posole will thicken as it simmers.

3) Cost:

onion: 25c
pepper: 80c
garlic: 20c
celery: 20c
spices/oil: 35c
hominy/white corn: 1.19
2 cans black beans: 1.38
parsley: 25c
crushed tomatoes: 69c

Total: about $5.31 or about 85c per serving.


How can I support Casual Kitchen?
Easy. Do all your shopping at Amazon.com via the links on this site! You can also link to me or subscribe to my RSS feed. Finally, consider sharing this article, or any other article you particularly enjoyed here, to Facebook, Twitter (follow me @danielckoontz!) or to bookmarking sites like reddit, digg or stumbleupon. I'm deeply grateful to my readers for their ongoing support.

Recipe A Day #18: Homemade Cherry Pie

A quick programming note: once again we'll have our Friday Links post up a little bit later today, as we continue with our month of new daily recipes. Enjoy!
*********************************

Baking pies is not in my cooking wheelhouse. In fact, other than a pie making lesson my mother gave me at least 30 years ago, I've never actually baked a pie. This might explain the not-in-my-wheelhouse part, I don't know.

Fortunately, I married someone who, weirdly, enjoys making pies. To the point where she finds making them meditative, even calming. Which is great for me, because I get a meditative and calm wife... and pie. Heh.

Today's Cherry Pie recipe, then, isn't my doing. It's Laura's. And it was amazing. One of the best pies I've ever eaten.

Homemade Cherry Pie

Filling
Ingredients:
4 cups pitted red cherries
3/4 cup sugar
1/4 cup cornstarch

Pie crust, see instructions below

Directions:
1) Place pitted cherries into a covered saucepan over low heat, and slowly heat cherries until they begin to release their juice. Stir often: don't let cherries burn or stick to the bottom. Gradually increase heat to medium-low as the cherries release more and more liquid, continuing to stir frequently for about 12 minutes.

2) Separately: In a bowl, combine sugar and cornstarch until uniform; pour the sugar/cornstarch mixture into the hot cherries and juice, and combine well. Bring to a simmer, reduce heat to low, and cook until the filling has thickened, about 2 more minutes.

3) Remove from heat, let cool (for about 1/2 hour), and then use as pie filling (see below for pie crust recipe). Bake at 375F for 50 minutes. Optional: use aluminum foil or pie "edge covers" on the edge of the pie crust to prevent the crust from over-browning.

Pie Crust Instructions
Ingredients:
2/3 cup + 2 Tablespoons Crisco (vegetable shortening)
2 cups flour
1 teaspoon salt
4-5 Tablespoons cold water

Directions:
1) Sift flour and salt into a large bowl. Add Crisco. Combine Crisco and flour using a pastry dough blender. When the dough is in pea sized pieces, gradually add the cold water, one tablespoon at a time, while fluffing and folding the dough with a fork.

2) After you've finished adding the water, flour your hands and using your hands gently press the dough into a ball.

3) Cut the dough into two equal-sized balls. Gently roll lower crust out and lay into a pie pan. Add cherry filling. Roll out the upper crust and lay on top of the filling, molding the two crusts together over the lip of the pie pan.
***********************************************
Recipe Notes:
1) Don't be intimidated by the prep-work involved in pitting cherries. From chef Laura herself: "Believe it or not, pitting cherries is way easier than peeling apples."

2) "What kind of cherries?" This was a question we got asked on when Laura shared this recipe on her Facebook page the other day. The short answer is: cherries. Uh, as in the kind you buy in your store's produce department for eating.

3) For more context on making a good pie crust, see CK's post on how to make an apple pie with a perfect flaky crust. Note also in the photo below that Laura took things up a notch and made one of those aesthetically pleasing lattice pie covers. If you want to learn how to make one of those, however, Google it yourself. Remember, pies are not in my wheelhouse.

4) Read the following only if you grew up during the 80s: When Laura first suggested making a cherry pie, I showed her this song, drawing on my freakish knowledge of 1980s pop music. She watched/listened for a few seconds, and then earnestly asked, "is this some kind of parody of an 80s hair band?"

"Sadly, no," I told her. "It is an actual 80s hair band. It was... an unfortunate era for music."


How can I support Casual Kitchen?
Easy. Do all your shopping at Amazon.com via the links on this site! You can also link to me or subscribe to my RSS feed. Finally, consider sharing this article, or any other article you particularly enjoyed here, to Facebook, Twitter (follow me @danielckoontz!) or to bookmarking sites like reddit, digg or stumbleupon. I'm deeply grateful to my readers for their ongoing support.

Recipe A Day #17: Citrus Braised Chicken and Root Vegetables

Today's recipe is a humble, easy and hearty dinner that serves four to five very well.

Citrus Braised Chicken and Root Vegetables


Ingredients:
5-6 whole bone-in chicken thighs
salt, pepper and cayenne pepper for seasoning chicken
olive oil
1-2 onions
2-3 cloves garlic
1 teaspoon ground thyme
1 teaspoon ground sage
½ teaspoon dried or fresh rosemary
1 small handful of frozen cranberries, dried cranberries, currants or raisins (optional)
1 small sweet potato, peeled, cut into medium cubes
1-2 medium potatoes, peeled, cut into medium cubes
2 carrots, peeled, cut into 2-3 inch chunks
1-2 stalks celery, chopped coarsely
3 cups stock (or 3 cups water and 1 bouillon cube)
2 teaspoons orange zest
about 3-4 Tablespoons orange juice
1 Tablespoon lemon juice, to taste

Directions:
1) Season chicken thighs on both sides with salt, black pepper and cayenne pepper. In a large, deep skillet, fry chicken in olive oil on medium-high heat, about 6-7 minutes per side, until nicely browned and nearly cooked through. Set chicken aside.

2) Saute onions in chicken drippings on medium-high for 2 minutes (optional: if you wish, you can remove perhaps half of the chicken fat first). Reduce heat to medium and add garlic and spices (thyme, sage and rosemary). Saute for another 5 minutes or so. Add optional cranberries (or currants or raisins) and about ½ cup of the stock/bouillon. Deglaze by scraping up all the browned bits on the bottom of the pan.

3) Add potatoes, carrots, celery, the remainder of the stock, the orange zest, and about 2 Tablespoons of the orange juice. Bring to a boil and simmer for about 10 minutes.

4) Add cubed sweet potato to the pan, then add the chicken thighs back to the pan, nestling them in among the vegetables. Bring to a boil again and simmer for another 15-20 minutes, or until chicken is done to your liking. Finally, add remaining two Tablespoons of orange juice and 1 Tablespoon lemon juice, shaking pan back and forth to combine everything well.

5) Serve over rice, ladling a generous amount of sauce and extra vegetables over each chicken thigh.

Serves 4-5.
***************************************************
Recipe Notes:
1) Once again, on leaving the fat in or taking it out: You can choose either, but we leave it in, taking advantage of the richness and increased satiety factor of fat-based calories.

2) On adding the sweet potato in step 4: Note that the sweet potato gets held back--it isn't added to the pot with the potatoes, carrots and celery. This is just to make sure it doesn't cook down to mush during the remaining time of the braise.

3) An unexpected surprise: This recipe has a rare and highly prized characteristic: it tastes even better the next day. Which means this can be a make-ahead recipe that gives you even more flexibility and options for dinner and menu planning. See other "tastes better the next day" recipes here at CK, like our Chicken Mole, Pasta Puttanesca, or Easy Slow Cooker Beef and Barley Stew.


How can I support Casual Kitchen?
Easy. Do all your shopping at Amazon.com via the links on this site! You can also link to me or subscribe to my RSS feed. Finally, consider sharing this article, or any other article you particularly enjoyed here, to Facebook, Twitter (follow me @danielckoontz!) or to bookmarking sites like reddit, digg or stumbleupon. I'm deeply grateful to my readers for their ongoing support.

Recipe A Day #16: Warm Asian-Style Sesame Spinach Salad

This catchy little spinach salad comes, once again, inspired by and adapted from the always reliable Moosewood Cooks at Home. It's easy to prepare, not too expensive, and it makes for a fancy and healthy side dish.

Plus, as a bonus with today's recipe, you'll get an easy-to-make homemade salad dressing that beats anything you can buy in the store. Enjoy!

Warm Asian-Style Sesame Spinach Salad


Ingredients:
20 ounces fresh spinach, rinsed
2 teaspoons sesame seeds

Marinade:
2 Tablespoons soy sauce
2 Tablespoons sherry
1 Tablespoon plain white vinegar
1-2 teaspoons brown sugar (to taste)
1 generous teaspoon minced fresh ginger

Directions:
1) Toast the sesame seeds by placing them in a flat oven-safe pan or a baking sheet for 5 minutes in a 350F oven. Remove and let cool.

2) Make the marinade: Combine marinade ingredients in a small pan and bring to a boil on your stove. Remove from heat and let cool.

3) Take still-wet rinsed spinach and saute very briefly in a non-stick pan (without any oil, just with the moisture on the freshly rinsed leaves!), until wilted but not fully cooked. Remove spinach from heat, toss with marinade and sesame seeds and serve immediately.

Serves 3.
***********************************
Recipe notes:
1) Marinade! Okay, the recipe as stated above makes about the right amount of dressing for the dish, and only the dish. But if you'd like, you can scale up this marinade and have extra handy for the future. It really makes a great salad dressing, and you can keep it chilled in your fridge for months.

Asian-Style Salad Dressing

Ingredients:
½ cup soy sauce
½ cup sherry
¼ plain white vinegar
2-3 Tablespoons brown sugar, to taste
1 inch piece of fresh ginger, minced

Directions:
1) Combine all ingredients in a small saucepan. Taste and adjust brown sugar for desired sweetness, then bring to a boil on the stove. Remove from heat, cool and store in a sealed jar or container in your refrigerator. Makes about 10 ounces.


How can I support Casual Kitchen?
Easy. Do all your shopping at Amazon.com via the links on this site! You can also link to me or subscribe to my RSS feed. Finally, consider sharing this article, or any other article you particularly enjoyed here, to Facebook, Twitter (follow me @danielckoontz!) or to bookmarking sites like reddit, digg or stumbleupon. I'm deeply grateful to my readers for their ongoing support.

Recipe A Day #15: Spicy Spanish Potato Onion Soup

This is a really simple and laughably cheap vegan soup that comes adapted from the always useful Moosewood Restaurant Cooks at Home, a cookbook that's an absolute gold mine for quick, easy and healthy recipes. Today's recipe is perfect for using up any extra potatoes and onions that might be languishing in your fridge after making, say, last week's Potato Corn Chowder for example. Enjoy!

Spicy Spanish Potato Onion Soup

Ingredients:
4 Tablespoons olive oil
5 medium onions, sliced into coarse slivers
6 medium to large potatoes, 4 peeled, 2 unpeeled, chopped into 1-2” cubes
3 teaspoons paprika
1 teaspoon dried thyme
1 teaspoon salt
1 teaspoon black pepper
½ teaspoon cayenne pepper
¼ teaspoon turmeric
A generous ½ cup sherry
3-4 bay leaves
9 cups water, in all
parsley for garnish

Directions:
1) Saute onions in oil on high heat for 2-3 minutes. Add all spices, combine well, reduce heat to medium and saute for another 7 minutes or so until onions are softening, browning and beginning to stick to the bottom of the pan.

2) Add one cup water and deglaze the bottom of the pan, then add potatoes, the remaining 8 cups of water, sherry and bay leaves. Bring to a boil, reduce heat and simmer for about 15 minutes, or until potatoes are tender. Serve in bowls and garnish with parsley.

Serves 10.


*******************************************
Recipe Notes:
1) Helpful hint: Feel free to pour a full cup of sherry and drink half as you prepare the recipe. We offer this tip regularly here at CK.

2) A flavor nuance: the idea behind sauteing the onions on high heat until they brown is to create a sweet flavor from the caramelization of the onions. We've previously seen this technique here at CK with Shrimp Creole, Paul Prudhomme Style, for example. This step adds an interesting and delicious nuance to the soup's flavors, so don't skip it!

3) Yet again, this is another incredibly inexpensive recipe. Let's run down the costs:

onions: $1.75
potatoes: $1.00
spices: 30c
sherry: 50c
bay leaves, parsley, oil, etc: 25c

Total: $3.80 or about 38c per serving. Hilariously cheap!

4) Attentive readers might find today's recipe reminiscent of another recipe here: Spanish Chickpea and Garlic Soup. Except that today's recipe is even easier and even less expensive.


How can I support Casual Kitchen?
Easy. Do all your shopping at Amazon.com via the links on this site! You can also link to me or subscribe to my RSS feed. Finally, consider sharing this article, or any other article you particularly enjoyed here, to Facebook, Twitter (follow me @danielckoontz!) or to bookmarking sites like reddit, digg or stumbleupon. I'm deeply grateful to my readers for their ongoing support.