Showing posts with label nostalgiafoods. Show all posts

Calling All Coffee Addicts: 100% Kona Coffee

I've talked about coffee a few times on this blog, sharing our favorite coffee store and our favorite way to make coffee. But until now I've never shared with readers our absolute favorite type of coffee.

This post is for those of you who truly love coffee, particularly if you prefer it strong, dark and bitter. Let me introduce you to Hawaiian Kona coffee.

We discovered Kona coffee a number of years ago on a visit to Hawaii, but to be honest it took us a little while to acquire a taste for this earthy and particularly strong brew.

And we'll probably never acquire a taste for the cost of this coffee, which is a rather unseemly $25.95 per pound. You can't get any further from laughably cheap than that, so obviously we don't drink this stuff every day.

Instead, we drink it on special occasions. Perhaps we'll treat ourselves to a pot of Kona after hard week, or I'll surprise Laura with a cup of it on a Tuesday morning (it's her longest and most grueling day of the workweek) as an extra incentive for her to leap forth and bring home the bacon. Any time we need a so-called happiness booster, a caffeinated kick from a strong pot of Kona coffee always seems to do the trick.

Let me also share the brand we typically buy: Hawaii Mountain Gold Coffee, from the Ferrari Coffee Company. Our favorite is the 100% Kona Dark Roast (a note to readers: this is simply a recommendation and not an affiliate link--we've been very happy with the quality and service of this company after years of ordering and drinking their coffee).

Finally, there's also a more affordable Kona coffee option available: Kona blend, which is a striking and rich tasting blend of Kona and regular coffee. And at a more reasonable $14-15 a pound, it's a lot easier on the wallet.

What is your absolute favorite brand of coffee? And have you ever tried Kona coffee? What did you think of it?

Kona Coffee Resources:
Ferrari Coffee 1-800-288-1542 (We buy the 100% Kona Dark Roast, at $25.95 in the bean or ground.)
Royal Kona Coffee

Related Posts:
How to Live Forever in Ten Easy Steps
Celebrating Something Special with Veuve Clicquot Champagne
The Greatest Chocolate Mousse in the World
Top Ten Most Popular Posts of Casual Kitchen

How can I support Casual Kitchen?
If you enjoy reading Casual Kitchen, tell a friend and spread the word! You can also support me by subscribing to my RSS feed, or submitting this article, or any other article you particularly enjoyed here, to bookmarking sites like del.icio.us, digg or stumbleupon.


How to Make an Apple Pie with a Perfect Flaky Crust

Sometimes the fall can be a bit of a depressing time of year for us here at Casual Kitchen. The summer is officially over, the days are becoming noticeably shorter, and darn it all, it's getting cold up here in the northeastern USA!

So it's at this time each year that we give ourselves a big happiness booster by making the classic autumn dessert: apple pie.

In today's post I'll share with you Casual Kitchen's own apple pie recipe, and I'll also share some bonus photos and instructions on how to make a flaky and delicious pie crust.
**********************
Apple Pie

Pie Filling:
3/4 cup sugar
1/4 cup flour
1/2 teaspoon nutmeg
1/2 teaspoon cinnamon
dash salt
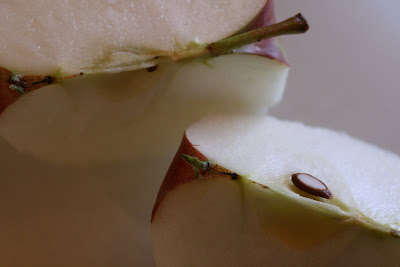
8-9 medium apples, preferably Macintosh apples

Combine sugar, flour and spices. Peel, quarter and core apples, then slice apples thinly (slices should be roughly 1/8 inch thick) into a large bowl. Shake sugar mixture over the apples and mix. Set aside.

Pie Crusts:
2/3 cup + 2 Tablespoons Crisco (vegetable shortening)
2 cups flour
1 teaspoon salt
4-5 Tablespoons cold water

1) Sift flour and salt into a large bowl. Add Crisco. Combine Crisco and flour using a pastry dough blender. When the dough is in pea sized pieces, gradually add the cold water, one tablespoon at a time, while fluffing and folding the dough with a fork.

2) After you've finished adding the water, flour your hands and using your hands gently press the dough into a ball.

3) Cut the dough into two equal-sized balls.
Gently roll lower crust out and lay into a pie pan. Add sliced apples. Roll out the upper crust and lay on top of the apples, molding the two crusts together over the lip of the pie pan (see photos below for more help on making the crust).

4) Bake in preheated oven for 1 hour at 375F.

**********************
Since there are some unique subtleties involved in making the perfect apple pie, today's recipe notes will be a bit longer than usual:

1) On choosing the right kind of apples: An in-depth discussion of the ideal apple type for a pie is unfortunately beyond the scope of this post. But for the sake of brevity, I'll share our favorite type of apples: Macintosh--if you can get them both fresh and locally grown. With their complex and slightly acidic taste they make a delicious, tangy, and not-too-sweet pie. If you can't get your hands on fresh Macs, we've found Cortland apples and Rome apples (or even a mix of all three) work well too.

There are dozens of different kinds of apples out there, each with its own taste, texture and consistency. It can be a real joy to compare and contrast pies (as well as other foods) made with different types of apples.

2) Note, however, that certain apples might look pretty in your grocery store, but they can taste surprisingly bland and mealy. Some types of apples end up in your grocery store not because they are particularly delicious or good for baking, but because they can survive a long haul trucking journey without looking too beat up to sell once they finally arrive in your store. Macintosh apples, for example, don't keep as long and don't travel as well as the more cosmetic apple varieties like red delicious or granny smith.

But in my view these sturdier and more cosmetic apples can make for a disappointingly bland pie. If locally grown apples are available where you live, use 'em to make your apple pies. You won't regret it!

3) A few thoughts and pictures to help you make the perfect pie crust: First of all, pie crusts are an excellent example of how we divide up labor at Casual Kitchen according to our respective core competencies. Laura has developed over the years a divine gift for making pie crusts (which, by the way, means that most of the pie crust wisdom in today's post comes entirely from her). I'm faster and more effective at the prep work involved in peeling, coring and slicing the apples, so that's my job. And because we do these two tasks in parallel, we can make a pie extremely quickly and efficiently. If you cook with a partner, spouse or family member, try to divide and conquer your cooking labors according to each person's unique skills and interests. You'll be amazed at how applying these principles can make cooking much more time-efficient and fun.

4) You'll also note the use of Crisco in this crust, even though it's typically a forbidden substance here at Casual Kitchen. You can substitute butter or margarine if you prefer, but Laura has found Crisco to give her the best balance between having dough that's easy to handle and dough that tastes great and has an ideal flaky texture. Plus, we can feed this pie to our vegan friends. But hey, let's not confuse pie with health food.

5) Some dough-making process advice for pie crust beginners: Be sure to coat your rolling surface, rolling pin and practically everything else within reach with a liberal coating of loose flour. This prevents the dough from sticking to everything. It also provides the side benefit of preventing the dough maker from having a temper tantrum.

4) Gently roll out the dough. Try not to overwork the crust. The more gentle you are, the flakier and lighter the final crust will be.

5) Use a thin spatula to gently lift the rolled crust up from your rolling surface:

6) Lay the crust out and gently mold it into the pie pan.

7) Add the apples, place the second crust on top, and pinch the two crusts' edges between your finger and thumb for an aesthetically pleasing look:

8) Don't forget to poke a few holes in the top of the pie with a fork to allow air to escape during cooking:
9) Bake, remove from the oven, photograph, and then enjoy your work of culinary art! Be sure to let it cool a bit before eating.

Related Posts:
How to Team Up in the Kitchen
The Favorite Cookbooks of My Favorite Bloggers
How to Modify a Recipe: The Six Rules
Seven Rules To Ensure Mistake-Free Cooking


How can I support Casual Kitchen?
If you enjoy reading Casual Kitchen, tell a friend and spread the word! You can also support me by subscribing to my RSS feed, or submitting this article, or any other article you particularly enjoyed here, to bookmarking sites like del.icio.us, digg or stumbleupon.


Carousel Cakes: Chocolate Mousse Supreme Cake

For all you lovers of chocolate cake out there, I'd like to introduce you to the greatest chocolate mousse cake in existence: the Chococolate Mousse Supreme Cake by Carousel Cakes.


This frighteningly good chocolate mousse cake solved one of my life's most vexing problems.

You see, last weekend was my birthday. And as I’ve gotten older I’ve found that I just don’t look forward to my birthdays any more. In fact, I'm at a point now where I pretty much dread them.

How unlike when I was a kid! When I was a kid, I dreamed of the days when I would be “older.” When I'd be older, I'd be an adult. Adults got to do what they wanted. And most importantly, they didn’t have bedtimes.

But of course kids grow up to find out, unfortunately, that pretty much everything they thought about being an adult was wrong. Adults actually don't get to do what they want, and worse, they have bedtimes too.

So when my birthday rolls around, I feel just another year older, another year slower, and another year closer to that big chocolate factory in the sky (I hope! I'd be pissed if I got sent down to the burning lake of vanilla).

I needed to find something, anything, to make my birthdays less painful. Naturally, I settled on something chocolate. And now, one of the things I look forward to most about my birthday is getting one of these cakes. Laura obliges me every year with a drive up to Nanuet, NY with $25.00 in cash ($24.00 for the cake and an extra dollar for the “Happy Birthday Daniel” writing), where she picks me up a large chocolate mousse supreme cake.

Keep in mind that this company distributes their glorious cakes to tons of cafes and restaurants all over New York City, and you can find yourself paying $6.50 a slice for it retail. Thus paying $25.00 for an entire cake just might be the best deal in the NYC metro area.

So imagine my joy when I came home from work last Friday night, peeked into the freezer, and saw....

Yep, it IS the chocolate mousse supreme...

Ooooooh,
Yesssssss!!!!


Granted, the large-sized cake is so enormous that we usually don't finish it off until sometime in mid-October. But it’s designed to be kept frozen, which serves a dual purpose: it's easier to slice up that way, and it keeps the cake from turning into a science experiment... :)

But I have to confess, that after a month of mousse cake eating, even I am ready to wait until next year for the next one.

Now that's a birthday!


Carousel Cakes Factory Outlet 5 Seeger Drive
Nanuet, NY 10954
Tel: 866-659-CAKE


Antioxidant Alert! How to Cook Swiss Chard

I grew up with swiss chard as a staple of my summer diet, as my father grew it in our backyard garden every year. I thought it was a totally commonplace vegetable as a kid—it wasn’t until years later (when Laura asked me “what the heck is ‘swiss chard’?") that I really figured out that nobody’s ever heard of it.

If you're unfamiliar with this humble green, you’re missing out! Swiss chard is amazingly healthy, packed with fiber, vitamins, minerals and important antioxidants like lutein. It is delicious, mild in taste and really inexpensive--usually only 99c to $1.49 for an entire pound at the grocery store.

And of course, because of the “no net calories” rule (meaning you burn almost as much energy eating and digesting it as you take in by eating it in the first place), you can eat swiss chard until you’re green in the face and never gain weight.

So today my goal is to give you a few quick instructions on how to cook swiss chard and encourage you to cook it for your family. And in the next few days, I’ll also post a great vegetarian soup recipe that uses either swiss chard or kale, which is another high lutein green.

How to Cook Swiss Chard:
First rinse the leaves well in water. Then cut the last half-inch or so off from the ends of each stem. This is for aesthetic reasons only (you know, the way it looks), as the stems are usually a bit discolored at the very end.

Then, put 2-3 inches of water into the bottom of a 4 or 5 quart sauce pan, and put on the stove on high heat. You can chop up the rinsed leaves and stems while the water comes to a boil. This is a textbook example of using parallel processing to save cooking time.

To chop everything most efficiently, I usually lay the full stack of leaves (with stems still attached) into one big pile on my cutting board and hack them crosswise into strips about one to two inches wide. You should be sure to slice up the stems. They're good too, with the consistency of a celery stalk but a milder taste.

Then I’ll turn the knife 90 degrees and cut the greens once or twice lengthwise. In just a quick minute or two you've reduced an enormous pile of swiss chard into reasonable, bite-size pieces.

Another hint: always prep more swiss chard than you think you need. The greens will cook down quite a bit in the pan.

Then, once the water is boiling well, pack the chopped greens into the pan and cover with a lid. Reduce heat to medium and let the greens steam for 10-11 minutes. Swiss chard is one of the sturdier greens out there, so you’ll want to give it a few more minutes of cooking time than more tender greens like spinach which cook fully in just 4-5 minutes.

Then drain and serve! I encourage you to avoid adding butter or salt, but you can certainly add pressed garlic for an extra kick.

Related Posts:
Attention Vegetarians and Vegans! Fresh Corn and Tomato Soup
Eat Right to See Right: Foods for Better Eye Health
Bad Vision: The Four Worst Diet Habits for Eye Health
Antioxidant Alert! Collard Greens with Rice and Kielbasa

Blueberry Coffee Cake: Nostalgia Foods

I was just home visiting my parents last weekend, so the cooking theme on my mind this week is nostalgia foods.

For me, these are usually recipes that my Mom made for me when I was a kid. There's an extra joy in eating childhood foods as an adult. Somehow it unlocks just a little bit of that childlike happiness that we tend to lose as we get older. For me, it's the combination of taste, smell and memory that brings these feelings rushing back.

Now that we're all serious, baggage-laden grownups, it's an all too rare occasion to reach that childlike state of happiness--that flowing mental state where you don't worry about the future or dwell upon the past, but instead you experience the simple joy of the present moment. And it feels all the sweeter when you also happen to be eating something really good.

Adult life--so often full of worries, obligations, tight schedules and vague sources of stress--doesn't let you get there too often, does it?

But of course nostalgia foods can be from any period of your life, not just childhood. I have plenty of nostalgia foods from my teens, my 20s and even my 30s.

I think maybe the best and simplest definition of nostalgia food is any food that reminds you of your past in a happy, simple and heartfelt way.

And the more I think about it, maybe the entire reason why I'm on a cooking journey to try new recipes and new cuisines is in order to create salient and memorable food experiences that might someday become tomorrow's nostalgia foods!

Today I'm going to share with you a favorite from my childhood: my Mom's blueberry coffee cake. It's perfect for this time of year because blueberries are in season right now in the Northeastern US.

We'd have it on occasional Sundays when I was a kid, either before or after going to church. It was always a special treat that I looked forward to. Funny how I never asked my mother for the recipe until now. But now that I have it, I'd like to share it with you too.

**************************
Blueberry Coffee Cake

1 1/2 cups sifted cake flour (note: be sure to sift flour first, then measure. Also don't use plain white flour--be sure to use cake flour--you can find it in the baking aisle of any grocery store)
1 3/4 teaspoons baking powder
1/8 teaspoon salt
1/4 cup butter (half a stick, or 4 Tablespoons)
3 Tablespoons sugar
1 egg
1/2 cup milk
1 cup blueberries (note: you can use frozen or fresh blueberries; if frozen, be sure to thaw them out first--don't add frozen blueberries directly into the batter or you'll have "cold zones" in the coffee cake that will come out undercooked and gooey)

Topping mixes:
Dry:
1/2 cup sugar
1 teaspoon cinnamon

Wet:
2 1/2 Tablespoons milk
1 Tablespoon butter

Directions:
Measure sifted flour. Add baking powder, salt and sift again.

Cream butter and sugar well, add egg and beat thoroughly.

Add flour, alternately with milk, beating well after each addition (note: my mother suggests adding about 1/4 of the flour, then alternate with 1/3 of the milk, then 1/4 of the flour, then 1/3 of the milk, etc, until you finish with the final 1/4 of the flour last).

Hand stir in the blueberries.

Pour batter into generously greased 9" layer pans (note: these are round pans usually used for layer cakes--at Casual Kitchen we actually don't own pans like this! You can use a 9" square baking pan instead with no problems).

Sprinkle the top of the batter with the "dry topping" mix of sugar and cinnamon.

Bake for 20 minutes at 375F. While the coffee cake is baking, warm the butter and milk (the "wet topping" mix) on low heat on the stove until the butter is melted. Stir well and spoon over the top of the coffee cake.

Then, bake for another 15 minutes at 375F. Serve warm.

************************