Invigorate Your Cooking with Fresh Herbs: Part 1

Today we’re going to start a two part series on the merits of using fresh herbs--like parsley, mint, cilantro, dill and chives--in your cooking.

By using these often overlooked and underappreciated ingredients, you can take your cuisine up several notches in sophistication, subtlety and healthfulness at a minimal extra cost. A large bunch of parsley costs roughly 99c in a typical grocery store, and most other herbs and greens are priced similarly.

For years I would pooh-pooh using herbs like these when I saw them called for in a recipe. If I saw a recipe that included fresh parsley for example, I’d either consider it an optional ingredient and leave it out, or I’d (shudder) use dried parsley from my spice rack.

Oh, the foolishness of youth!

The errors of my ways sprung from two serious flaws I had back then (yep, I only had two flaws). First, I was habituated to foods with high sodium content, so I had a desensitized palate that lacked the ability to appreciate these subtle-tasting herbs. Second, I foolishly considered buying fresh herbs wasteful. I'd end up using just a fraction of what I bought and let the rest go to waste. I'll address that issue later in Part 2.

Today, I will cover the use of these herbs in the context of improving the subtlety and quality of your cooking. We’ll talk about how the inclusion of simple and inexpensive herbs can make your food smell and taste surprisingly exotic, and we’ll talk about how our efforts over the years in reducing our sodium intake ultimately enabled these herbs to be powerful flavor-makers in our kitchen. Now, our cooking tastes better than ever to us, which of course makes it all the more fun to cook.

Free Yourself From the Chains of Salt!
Close readers of this blog know that using excessive salt is the worst form of cheating. Face it: it’s unhealthy (and for some people even dangerous) to consume too much sodium. Even more discouraging, a palate habituated to salt and salty foods simply cannot appreciate mild and subtle tastes.

Why did parsley taste like pointless nothingness to me years ago, such that I thought nothing of considering it an optional ingredient? Why does it seem like such a powerful and fragrant ingredient now? It all stems from our efforts to “stop cheating” and ruthlessly exclude salt from our diets.

What happened to us will happen to you: once the added salt wasn’t in our food drowning out everything else all the time, our palates gradually grew to recognize and appreciate subtler tastes. It’s analogous to being at a bar where the music is so loud that you can’t hear the voice of the cute girl (okay, or guy) you’re trying to pick up. Only after somebody turns down the music can you actually engage with the other person.

Food works in a similar way. Certain flavoring agents, like salt, sugar, high-fructose corn syrup, etc., are simply too “loud.” Salt is of course widely overused in all sorts of prepared foods, and sadly we’ve often found salt audaciously overused in some of the most expensive restaurants in New York. Shameless.

Phew. Okay. Back to being subtle. One of the key purposes of this blog, above and beyond sharing cooking knowledge, advice and recipes, is to show that it can be fun and easy to cook healthy, interesting meals for you and your family. What's made cooking more fun for us in recent years is re-discovering ingredients like fresh herbs and greens that we can combine with other everyday ingredients in creative, and even exotic, ways. Get the salt out of your diet and watch how these herbs stimulate your palate.

Use fresh herbs. Look for recipes that call for them (I'll share several in Part 2). Think of what they'll add to the freshness, subtlety and flavor of any dish, for a mere 99c! That is a laughably cheap price to take the sophistication of your cooking up several notches. And if you succeed in breaking the salt habit, you'll not only enjoy food more, you’ll save a fortune down the road on high blood pressure meds.

*********************************

I’ll leave you with some pictures and brief advice on how to deal with fresh herbs by showing the prep work behind the fresh parsley we used in a dish we made the other weekend. It was another home run recipe from my new girlfriend Daisy which I’ll be posting shortly.

First, be sure to rinse these guys to death. Herbs tend to be grown in sandy soil, thus they can be pretty gritty. Nothing is worse than enthusiastically biting into a delicious mouthful of Fattoush and getting sand stuck in your teeth. I always aggressively slosh the greens around in a simple colander under a running faucet:

The next step is to de-stemify these guys (that’s a real word). Note that for some soups, especially the ones we often talk about in Jay Solomon's Vegetarian Soup Cuisine, you can speed up your prep time by skipping or being haphazard with this step.

That’s it! Easy to prepare. Check back soon for Part 2, where we’ll solve the waste issue once and for all, and share a variety of sample recipes where you can put these herbs to work.


Chocolate Mousse Supreme Cake Update

A quick and entirely spurious update on my birthday chocolate mousse cake:

It’s now been more than one month of what feels like constant chocolate mousse cake eating, and we’ve just crossed the halfway point towards finishing off this enormous (and fortunately freezable) cake.

Believe me, this is a great cake, the best I’ve found in the New York region, but I’m not sure I’m exactly in love anymore.

I’d say I’ve crossed over from love into more of a quiet determination: I. Will. Finish. This. Cake.

But then I think I might have to go on another chocolate fast afterwards....


Carousel Cakes Factory Outlet
5 Seeger Drive
Nanuet, NY 10954
Tel: 866-659-CAKE


Related Posts:
Carousel Cakes: Chocolate Mousse Supreme
Ten Strategies to Stop Mindless Eating

The Shandy

In our continuing effort to make every single drink in the Mr. Boston Official Bartender's Guide, we bring you today possibly the easiest drink in the entire book: The Shandy.

I first learned of this drink while watching "The Remains of the Day" where the beautiful Emma Thompson has one in a pub ("....another shandy, Miss Kenton?").

Made of equal parts beer and ginger ale, it's the type of drink that, uh, any self-respecting man would of course never drink. Clearly I would never be caught drinking one of these in a million years.

However, as proof of the enormous sacrifices I willingly make in writing this blog, I will confess to taking a few furtive sips of Laura's.

But there are certain advantages to the Shandy worth considering.

First, you're drinking just 1/2 a beer at a time, so you can basically drink these all night and still drive home.

Second, there's absolutely no stress involved in getting this drink recipe just right--it doesn't matter whether you put the beer in first, or the ginger ale in first; either way it tastes the same. That's my kind of drink. Assuming I would drink something like this. Which I wouldn't.

Finally, this is the perfect beverage to serve to someone who claims they don't like beer. You've heard of gateway drugs? Consider this a gateway beverage. Down the road your poor, poor beer-disliking companion will graduate from shandies to true beer drinking.

*********************
The Shandy

Fill a glass half full with beer, then fill the rest of the glass with ginger ale.
*********************


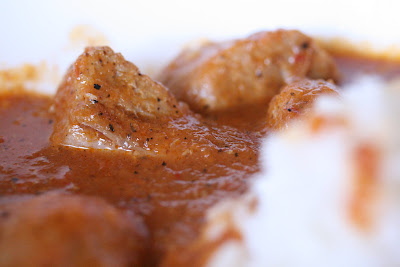
Braised Pork in Guajillo Chile Sauce

Tienen guajillo chiles?

Si. Pica?

Forget about the stresses of working on Wall Street: the most stressful thing I did last week involved walking into our town's local Mexican specialty food store, breaking out my high school Spanish, and asking for a type of chile that until two weeks ago I'd never even heard of.

But I just saw an episode of Daisy Cooks! on PBS that made me drool like nothing I've seen on TV in years (I don't normally drool). After twenty minutes of watching her cook the very recipe I'm going to write about today, I'd been cured in advance of my next several cases of cooking burnout.

So I bought her new cookbook* and made Braised Pork in Guajillo Chile Sauce. Below I'll share the recipe and my experiences making it.

Bottom line: it was a huge hit in our home, and it's one of about 40 recipes in her cookbook that I can't wait to make. I'll be adding this cookbook to my collection shortly.

But back to my guajillo chiles.

When I'm considering a new recipe, I typically use the five easy questions test to decide if a recipe is worth cooking. In this case, question #2 ("does it contain any bizarre or impossible-to-find ingredients?") could have been a key failure point.

Fortunately, in our town we've got a pretty big Latin American population, so I have two local Mexican specialty food stores to choose from. Daisy herself suggests places like mexgrocer.com, amigofoods.com and cubanfoodmarket.com where you can buy hard-to-find ingredients online. So if you decide to try this recipe, don’t let the one unusual ingredient stop you. It can be found more easily than you’d think.

But I was far too impatient to wait for my guajillo chiles to arrive in the mail.

And as I suspected, the girl behind the counter didn't speak a lick of English, except for a friendly "bye!" which she said to me as I walked out the door.

But I asked my question (and she actually understood me), and she sold me an enormous bag of guajillo chiles for just $2.50.

And yes, I took the hot ones.

I have a hunch Daisy will be sending me back there soon for some other ingredients.
******************************
Braised Pork in Guajillo Chile Sauce
Slightly modified from Daisy Cooks!

3-4 lbs pork shoulder or butt, cut into 2 inch cubes
2 Tablespoons sea salt or kosher salt
1 bay leaf

10 guajillo chiles

1 large onion, peeled and cut in half through the middle
3 fresh plum tomatoes, cut in half lengthwise

1/4 cup olive oil

2 Tablespoons white flour

1) Put the pork in a large pot and cover in cold water by 2 inches. Add the salt and bay leaf. Bring liquid to a boil and simmer, covered, for 1 hour. Skim off any foam as necessary.

2) Bring 3 cups of water to a boil in a medium saucepan. While the water is coming to a boil, remove the stems from the chiles and shake out the seeds. Heat a nonstick pan on medium heat. Toast the chiles in the pan, turning them frequently, until they start to
change color and crisp up a bit, about 4 minutes. Lift the chiles out and place them in a bowl and pour enough of the boiling water over the chiles to cover them fully. Soak for 20 minutes until chiles are softened, then drain well.

3) While the chiles are soaking, place the onions and tomatoes, cut sides down, in the skillet. Turn heat up to medium high and cook, turning the vegetables until blackened on both sides.


4) After the pork has been simmering for 1 hour, remove 2 cups of the cooking liquid and pour it into a blender or food processor. Add the onions and tomatoes and puree until smooth. Then add the chiles and puree until smooth. Remove another 2 cups of the pork cooking liquid and set aside. Drain the pork and wipe out the pot.

5) Set the pot over medium heat and add the canola oil (please, only use lard if you truly have no respect for your arteries). Stir in the flour and cook for 3-4 minutes. Pour the pureed chili sauce into the pot, add the pork and simmer, covered, for another 1 hour. If the sauce becomes too thick or isn't fully covering the pork cubes, you may add some of the remaining 2 cups of cooking liquid to the pot.

6) Serve with rice, makes enough for 5-6.


******************************
A few notes on the recipe as well as our experiences making it:
1) Don’t try and substitute any other kind of chili here. First, Daisy will probably hunt you down and kill you. But also the guajillo chiles add an unusual dimension to the sauce. They have a smoky, almost chocolate smell to them (hmmmm, might explain why I like them so much), and doubtless this is part of the authenticity of the dish. A further note: these chiles can be pretty hot. If you don’t like very spicy food, you can try halving the pepper count to five instead of ten. We used only six chiles the first time we made it, but I have to admit now that I regret not doing the recipe by the book first. We definitely could have handled the extra heat. I’ll be using the whole ten on my next attempt.

2) As you can see from the photos, when Daisy says "blacken" she really means it. You have to literally burn the onions and tomatoes.

3) I’ll note that TV version of the recipe differed slightly from the cookbook, although in fairly minor ways. For example, in her show, Daisy has you brown the chiles in a dry pan (same as with the veggies), but the cookbook inexplicably tells you to brown the chiles in oil. I corrected the cookbook version above to match the show. There were also some modest differences in cooking times too, but again these were minor.

4) Finally, I highly, HIGHLY recommend this cookbook for any adventurous cooks out there who want to sample some truly authentic yet accessible Latin cuisine. Click the graphic link below to go directly to Amazon.com.

Once again, you are welcome to take a look at the full photoset from Flickr for a larger collection of pictures on the making of this recipe.

* Note: if you enter Amazon via a link on my blog and buy something, I'll get a small commission on that purchase. Please think of it as my "tip jar"--and thanks so much to those readers out there who support me!


Related Posts:
Shrimp in Garlic Sauce (Camarones Ajillo)
How to Make a Mole Sauce: Intense, Exotic and Surprisingly Easy to Make
The Bhut Jolokia Pepper--The World's Hottest Chili
How to Make Burritos


How can I support Casual Kitchen?
If you enjoy reading Casual Kitchen, tell a friend and spread the word! You can also support me by purchasing items from Amazon.com via links on this site, or by linking to me or subscribing to my RSS feed. Finally, you can consider submitting this article, or any other article you particularly enjoyed here, to bookmarking sites like del.icio.us, digg or stumbleupon. Thank you for your support!

The History of Tabasco

There was a well-written book review in today's Wall Street Journal that I thought was worth sharing. It's about the history behind my favorite non-alcoholic liquid, Tabasco. The controversy behind the trademarking of the name alone makes it worth the read. There's a link below directly to the article as well as a few of the more interesting passages from the article itself.

The book is called McIlhenny's Gold: How a Louisiana Family Built the Tabasco Empire. And any readers who want to take a closer look at the book itself, just click the book links to head over to Amazon.

Enjoy!
***************************
Ingredients of a Family Fortune by Mark Robichaux (Wall Street Journal, October 10, 2007, page D11).

"...As the legend goes, a Louisiana banker named Edmund McIlhenny -- his family's Avery Island plantation in ruins after the Civil War -- took the seeds of a Mexican pepper given to him by a Confederate soldier and began a condiment business in 1869, the forerunner of today's company and the origins of a brand name now recognized throughout the world."

"Given Tabasco's three simple ingredients -- vinegar, pepper mash and salt -- competitors who had been using the Tabasco pepper in their own sauces were stunned in 1906 when the McIlhennys were awarded a trademark for the word "Tabasco." It was as if someone had claimed the word "mustard." ... The trademark was later successfully defended in court and today stands as an American business rarity: a trademark that is also the name of a generic ingredient. The McIlhennys have vigilantly enforced their rights ever since."
************************************

The Recipe Filebox

Even after just a year or two of cooking, after collecting recipes and cookbooks from various and sundry sources, you'll probably find your recipe collection growing out of control.

We tend to be slow learners here at Casual Kitchen, so even after nearly two decades of eclectic recipe collecting (and countless diregarded opportunities to get organized), we're still stuck fiddling around with loose papers stuffed randomly into recipe books, recipes cut out from a bag of lentils, and even recipes cut out of the side of a cardboard box of couscous. Seriously.

Take it from us: a small recipe filebox with lettered dividers is an absolute necessity in the kitchen so you can find those recipes when you need them.

Which brings me to an amusing tale about the idiosyncracies of how people organize recipes.

My mother prefers to file things under functional categories. For example, in her recipe file box, the letter "M" contains all of the "Main Dishes" she makes. So when I'm in her kitchen looking for a house favorite like Mock Wild Rice, I won't be able to find it. I'll be foolishly rooting around under "R".

Laura on the other hand tends to be extremely literal in her filing approach. The first letter of the recipe is the letter it goes under in our file box. This is a strict system: for example, if a recipe starts with the word "The"--yep, you guessed it, it goes under "T".

So for her, a dish like our laughably cheap Red Lentils and Rice definitively goes under "R" for "Red".

Of course, I'm in deep trouble whenever Laura refiles one of our recipes. Because of my stunning lack of adaptability, I simply will not be able to find it. I'll search and search under "L" and then I'll close the file box, then re-open it, flip to "L" and take just one more look. I'll never think to look elsewhere.

In Psych 101, they'd say I lack mental plasticity. I'm like a blind chicken that keeps pecking in the same place, never figuring out that the kernal of corn is, uh, over there.

I just wish the world would adapt to my system, which is an ingenious and flexible filing system that, according to Laura, makes no sense whatsoever. So Red Lentils and Rice of course goes under "L" for Lentils. Mock Wild Rice goes under "R" for Rice.

Fortunately, at least in the case of Mock Wild Rice, my wife and my mother totally agree that it should be filed under "M". Although of course for different reasons.

But at least both of them can find the recipe.

Italian Sausage and Tortellini Soup

Now that the weather is getting cooler and the fall is unmistakably moving in, it's time to get back into some good hearty soup recipes. Today I'm going to share a personal favorite from our heavy rotation: Italian Sausage and Tortellini Soup.

This soup can be made from beginning to end in about an hour, and it will easily feed six or more.

*****************************
Italian Sausage and Tortellini Soup
(heavily modified from an old issue of Bon Appetit Magazine)

4 links sweet or hot Italian-style sausage, casings removed (see photos below)
1-2 onions, chopped
3-4 garlic cloves, pressed or finely chopped
6 cups water
3 beef bouillion cubes
3/4 lb chopped fresh tomatoes (we usually use plum tomatoes)
1 8-ounce can plain tomato sauce
1 large zucchini, cut into chunks
3-4 carrots, peeled and sliced
1 green bell pepper, chopped coarsely
1/2 cup dry red wine
1 Tblsp dried basil
1 Tblsp dried oregano
-----------------
8-16 ounces frozen cheese tortellini
Freshly grated Parmesan cheese

Remove casings from the sausages, then fry in a large pot with a little oil until cooked through, breaking up the sausages with a spatula as you fry them. Transfer sausage to a separate bowl and pour off most of the sausage fat left in the pot (leave ~1 Tbsp of fat or so).

[CK note: If you really want to go low fat, you can drain all the fat from the pot and strain the sausage under hot water, then add a Tablespoon or so of olive oil back to the pan before the next step.]

Saute onion and garlic on medium heat in the remaining sausage oil for ~5 minutes. Then, add back the sausage, and add all of the remaining ingredients except the tortellini and Parmesan cheese (water, bouillion cubes, tomatoes, tomato sauce, zucchini, carrots, green pepper, red wine, basil and oregano).

Bring to a boil, reduce heat, and simmer for ~40 minutes, until vegetables are tender.

Then add tortellini to the soup and simmer for another 8 minutes.

Serve in soup bowls, sprinkled generously with parmesan cheese.

Serves 6+ easily.


******************************
A few notes:

1) A quick tutorial on removing casing of sausages (with apologies to vegetarian readers!). It's easiest to do this when the sausages are mostly thawed. And be prepared to get slightly messy hands.

First, work a knife under the sausage casing:

Then cut it along the length of the sausage as shown:

At this point you'll see how the casing will peel off relatively easily.


2) For some reason, the team here at Casual Kitchen has a consistent problem of forgetting the cheese tortellini. Either we forget to put tortellini on the grocery list so we leave the store without them, or we flake and forget to add them to the dish at the end. It's a non-catastrophic, yet still annoying, error that we've made enough times such that Laura wrote "don't forget!" on the ingredient list next to the tortellini. I thought I'd share this to let readers know that here at Casual Kitchen we flake out and forget things too.

3) You know my view on excess salt. In its original form, this dish called for five cups of water and five (five!) bouillion cubes. That's cheating. We've cut it down to three cubes in six cups of water and have found the dish tastes great this way, but you are welcome to try and take the cube count down further still if you like. Let me know how it comes out.

4) Finally, if you're interested in a more detailed photoset of the entire recipe making process, I've made it available on flickr for you. Enjoy!


Boiled Peanuts: Foods You Only Need to Try Once

I'm still reeling from a culinary experience from our recent North Carolina trip: boiled peanuts. Or "burled peanuts" as we started calling them on our drive home.

I don't know what came over me. We were in peanut country, we saw homemade signs advertising them every few miles on the road, and I guess I got carried away. I wanted to try boiled peanuts.

Mistakes were made.

But instead of a total loss, these burled peanuts became the seed of an idea for a new (albeit hopefully infrequent) series: foods you only need to try once. I'll try them, and with any luck, I can spare you from the experience.

At first they looked harmless, just a can full of peanuts soaking in brine. How bad could they be?

Well, let's just say at least they weren't terrible.

Boiled peanuts are like regular peanuts in the sense that you still have to remove the shell. But you can't really "crack" open the shell like you would a dry peanut. It's too waterlogged from sitting in a can of brine.

Instead, you more or less smoosh open the shell. Unfortunately, in my first attempt, I smooshed open the shell a bit too vigorously, and I reduced the poor peanut inside to mush between my fingers.

This was not a good sign texture-wise, I thought to myself.

And, unfortunately, I was absolutely correct about the texture of the peanuts. They were mushier than mooshy beans. The experience was like eating a salty, wet, peanut paste.

But on the plus side, I found the information on the can label quite instructive, particularly the cautionary warning MAY CONTAIN: PEANUTS....

I'm slightly more concerned, however, with identifying erythorbic acid. I wonder, is it at all like sodium hexametaphosphate?

Like I said, I tried 'em so you don't have to.